Suppose you once started with a Windows Server on which you installed multiple roles and features, but now you have multiple servers in use and redistributed the roles and features over them. It is no longer desirable to keep some of those roles and features installed on your older Windows Servers and you want to free up resources.
Fortunately, it is quite easy to remove roles and features from Windows Servers. We will show you how this works in this tutorial.
Step 1
Connect via Remote Desktop or the VPS console to the server on which you want to uninstall the roles and/or features, or to the server that manages your server pool.
Step 2
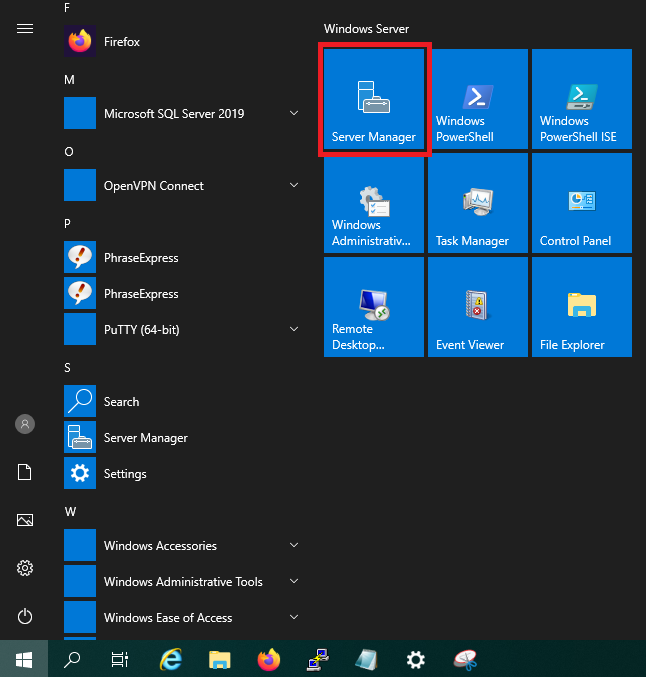
Click the Windows Start button and then click 'Server Manager'.
Step 3
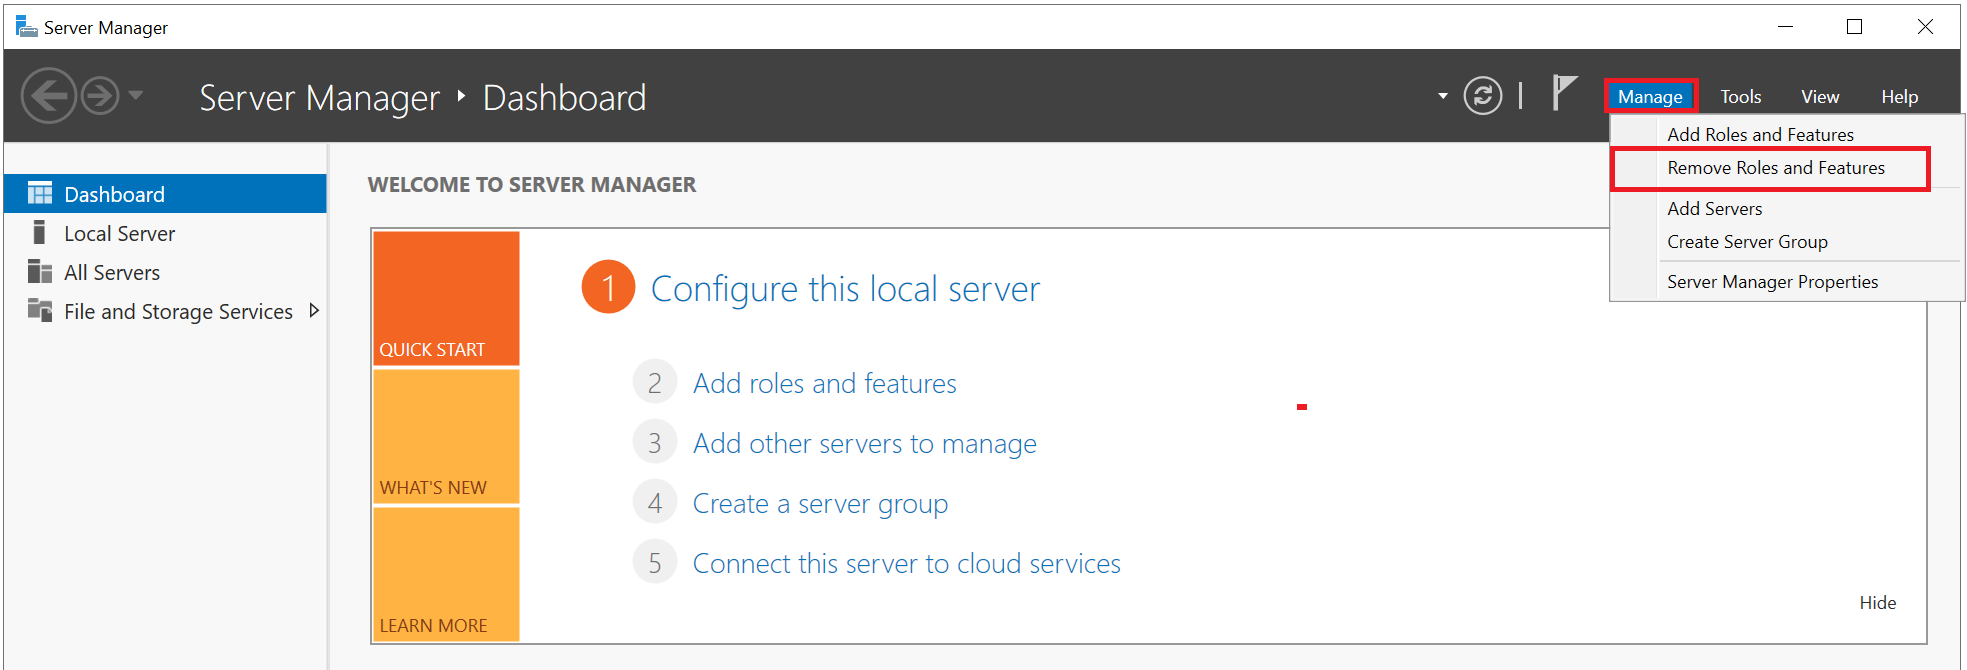
Click 'Manage' at the top right and select 'Remove Roles and Features'.
Step 4
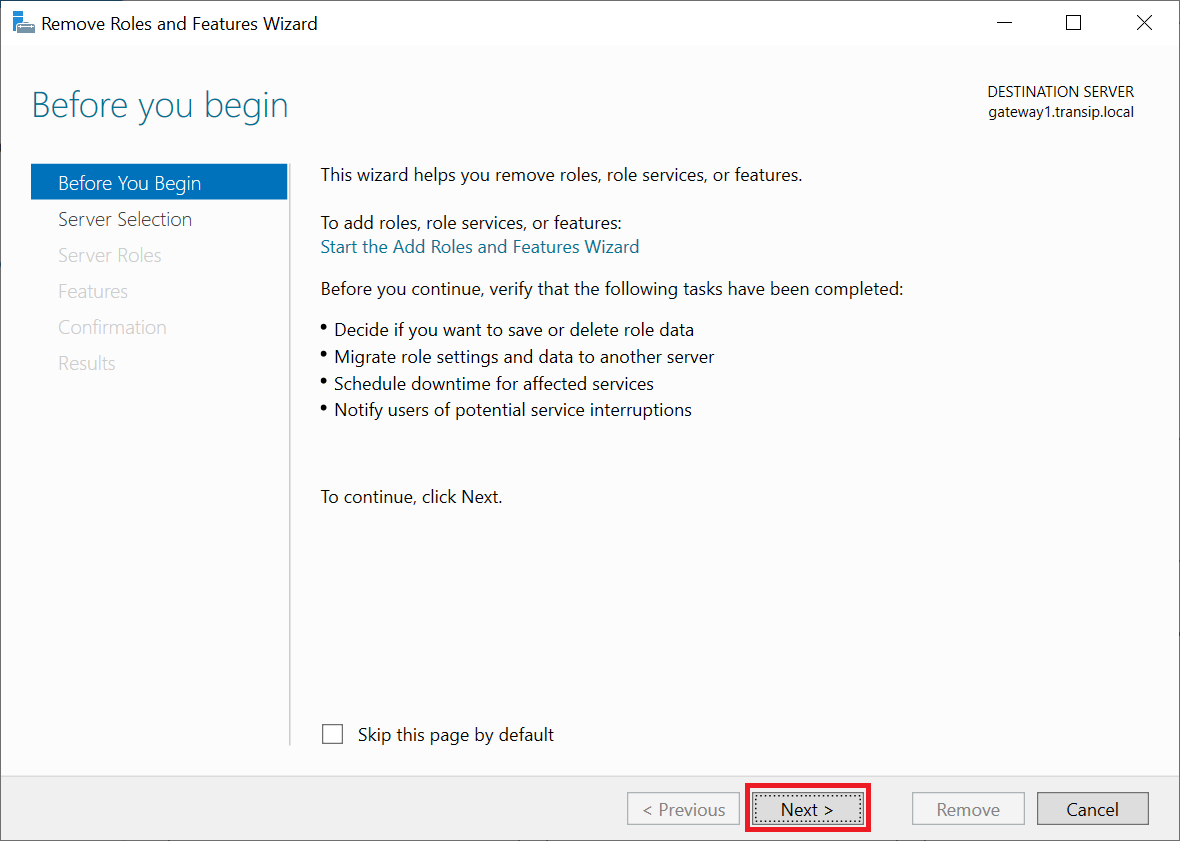
The 'Remove Roles and Features Wizard' will open. This indeed looks just like the wizard for adding roles and features. Click 'Next' to get started and optionally check the option not to see this screen again.
Step 5
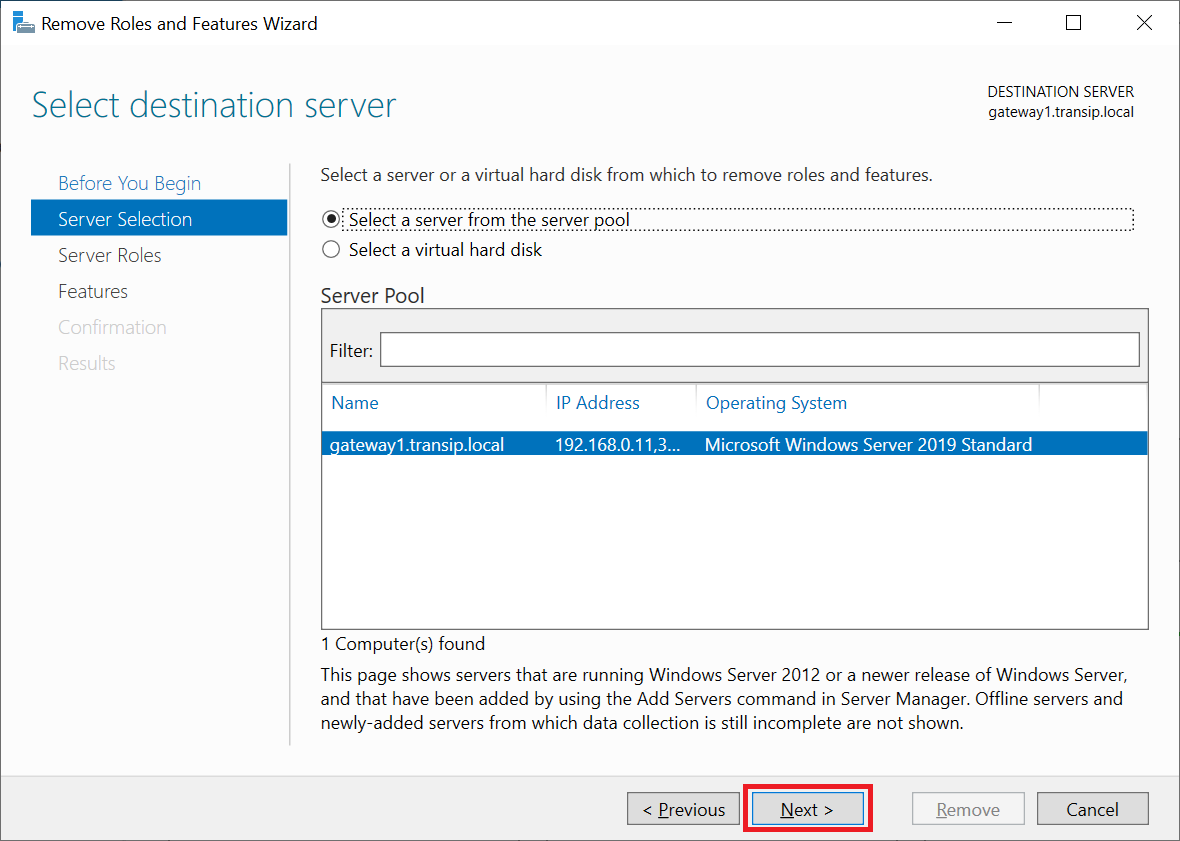
Select the server from which you want to remove the roles and/or features. If you do not use a server pool, only the server on which you go through this wizard is visible.
Step 6
Uncheck the role you want to remove or directly click 'Next' if you only want to remove features.
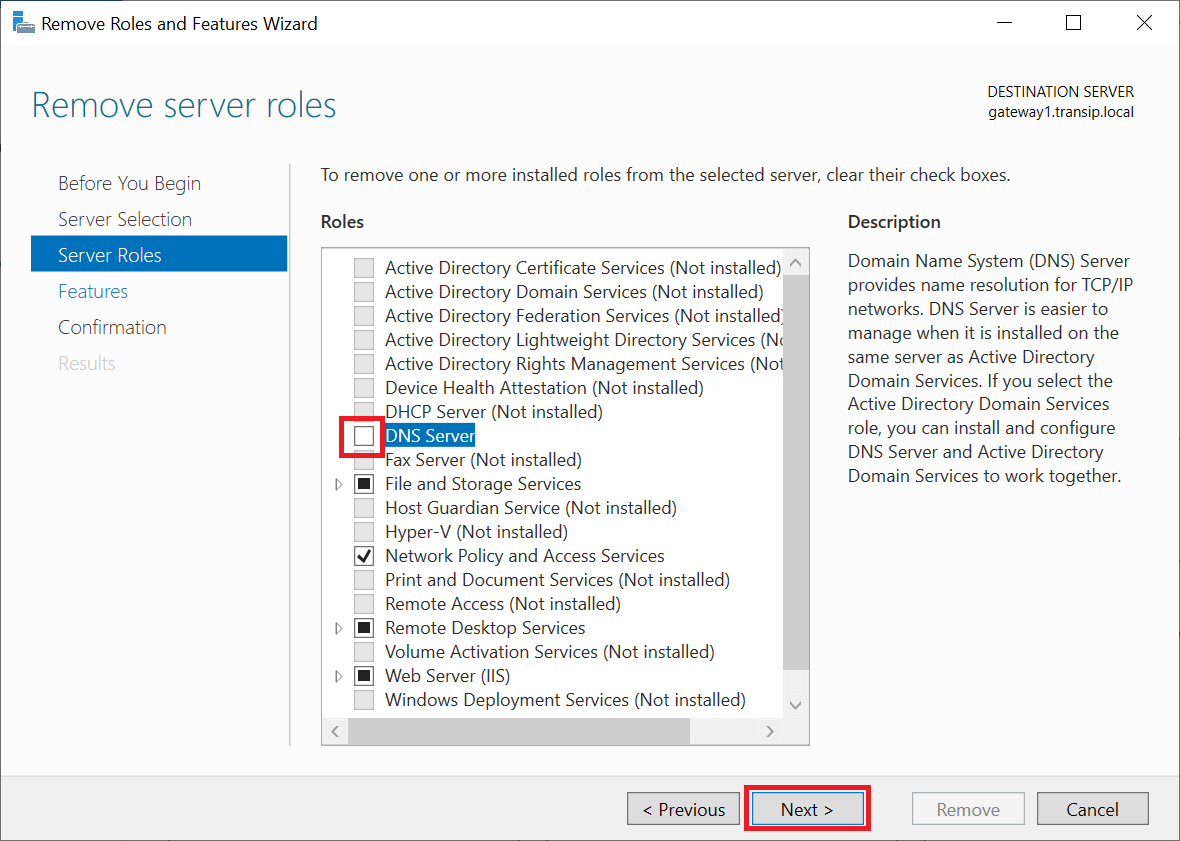
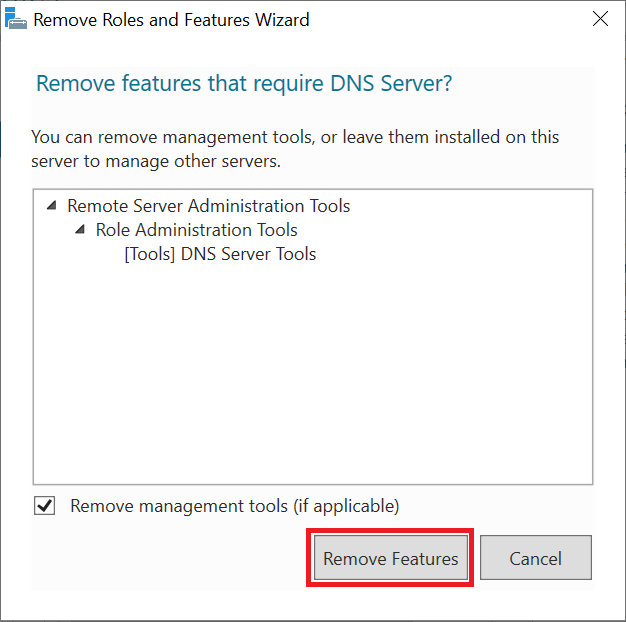
After unchecking a role, you will immediately see a pop-up asking if you also want to remove the associated features. Confirm this and then click 'Next' (see the screenshot above) to continue.
Step 7
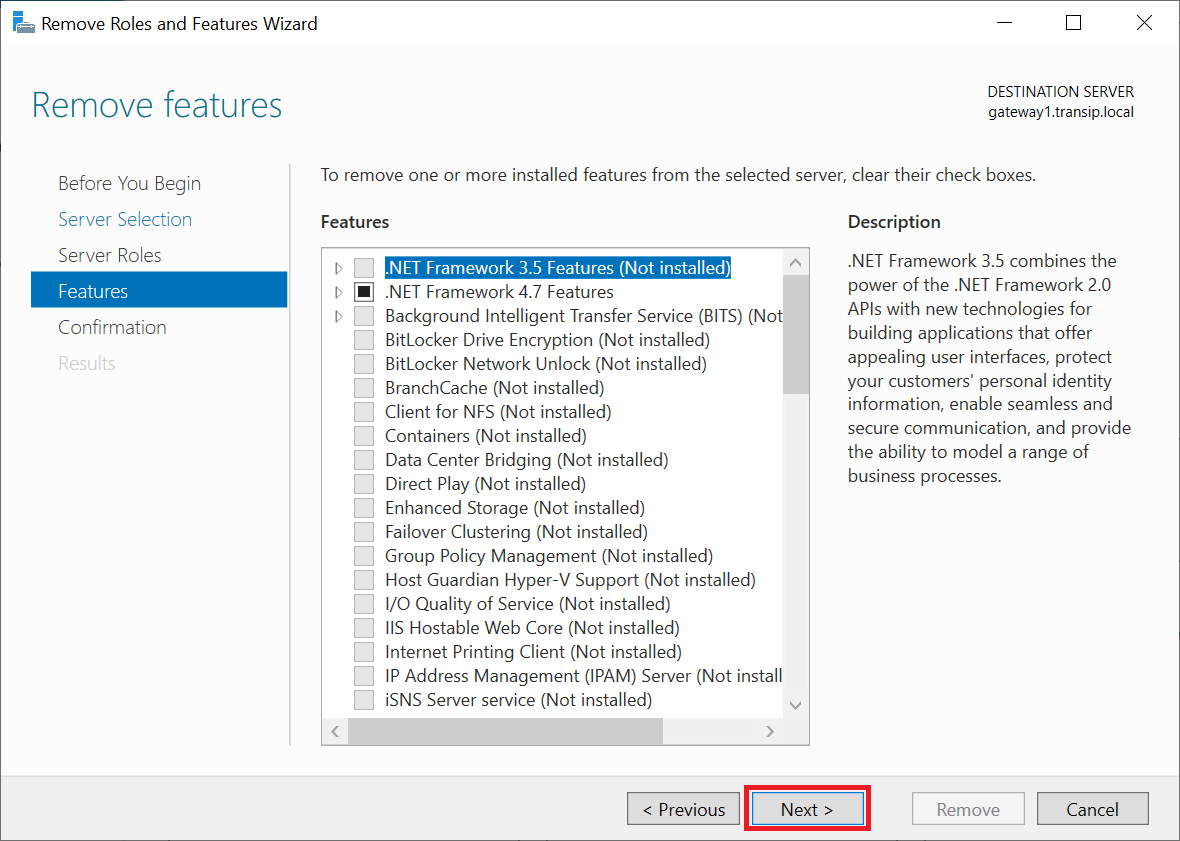
Uncheck the features you want to remove or directly click 'Next' if you only want to remove roles.
Step 8
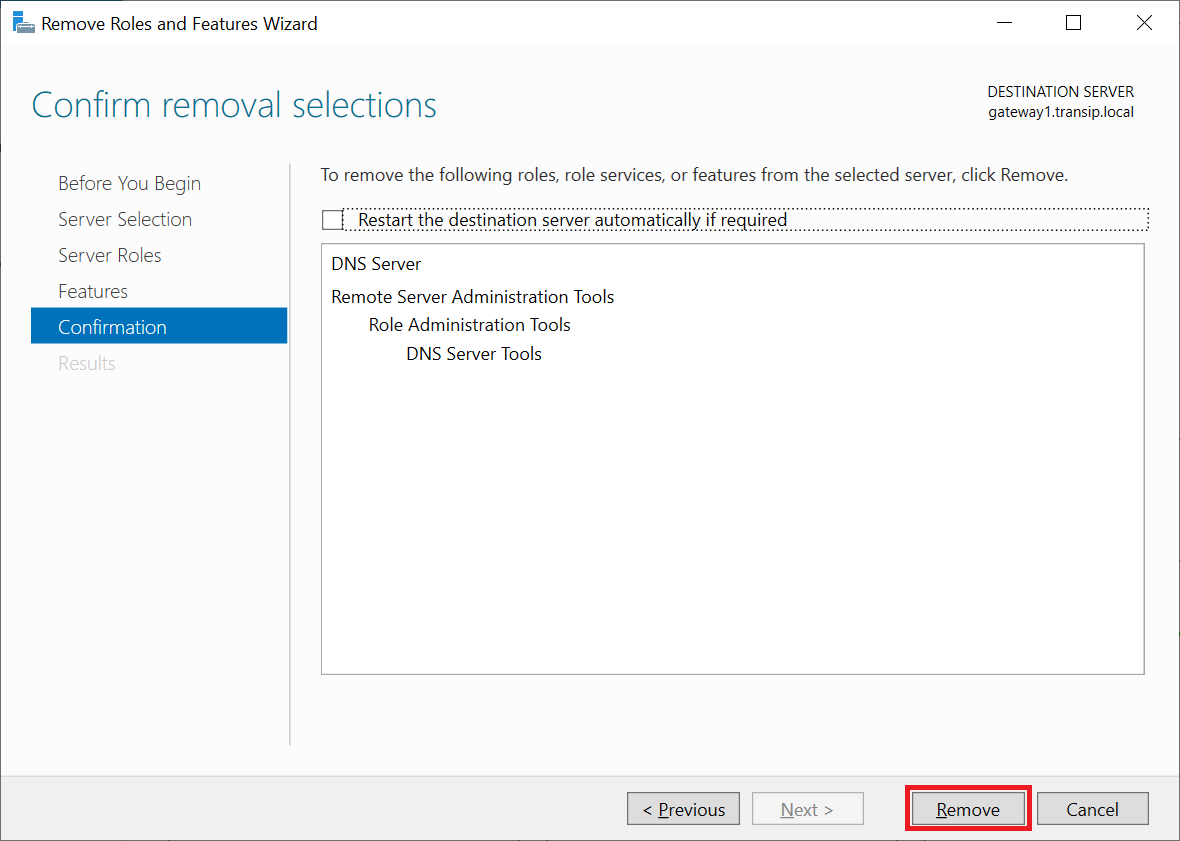
Check your choices and click 'Remove' to remove the selected roles and/or features. In most cases, a restart of your server is required, so you can already indicate that the server may automatically restart after the uninstallation if necessary.
Step 9
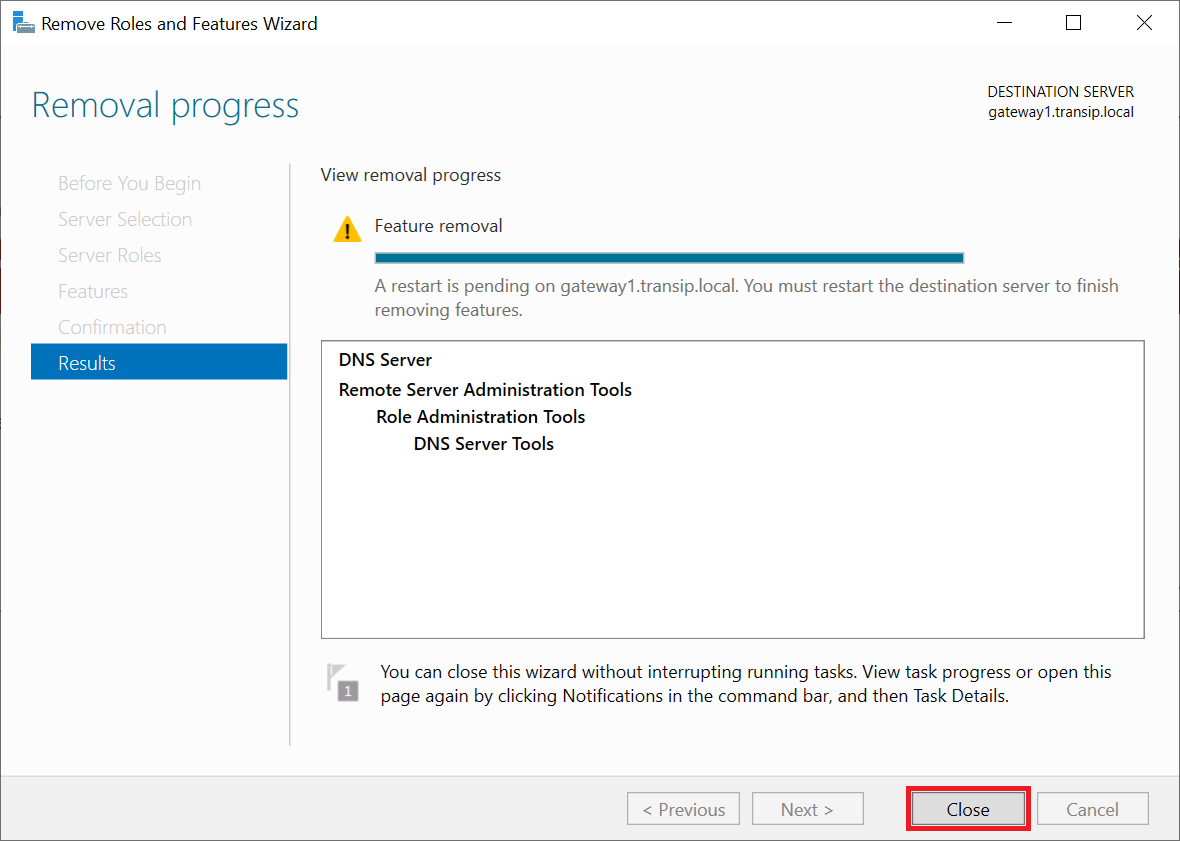
Click 'Close' when the uninstallation is complete to close the wizard.
That brings us to the end of this guide to removing roles and features from Windows Servers.


