In this manual we'll demonstrate how to install and activate Office 2016 on your Windows VPS. For this guide we make use of Windows Server 2016 and Microsoft Office 2016 - Professional, though you can also use Microsoft Office 2016 - Standard. See this page for more information about the different versions.
- In your control panel you can find the license key and ISO download link for Office 2016.
- On this page you can order a license key for Office 2016.
Installing Office 2016
Step 1
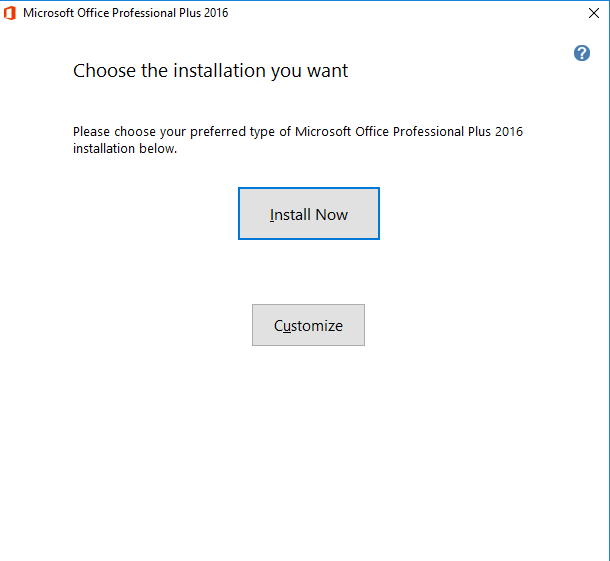
Upon starting the installation you're greeted by the screen in the screenshot below. Choose 'Customize' in order to select the components you'd like to install.
Step 2
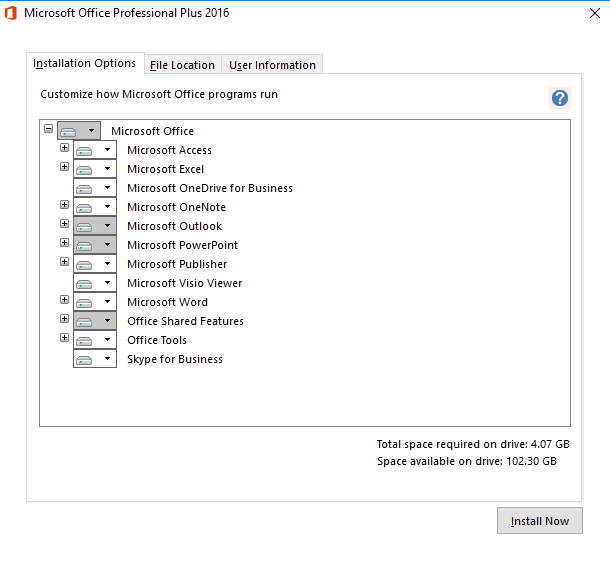
Under 'Installation Options' select the components you'd like to install. Next click on 'File Location' in order to choose the installation directory and / or click on 'User Information' in order to change your personal installation, or click 'Install Now' to install Office 2016 immediately.
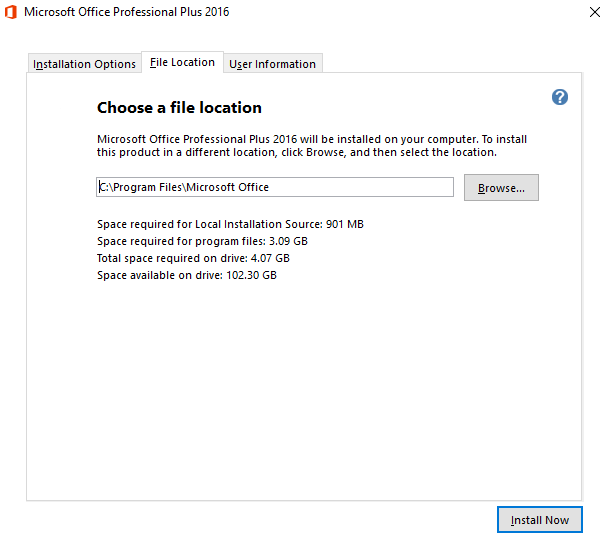
In the 'File Location' tab you can adjust the installation directory. For instance, you could choose to install Office 2016 on your Big Storage disk, provided you use Big Storage (though your c:\ would be faster).
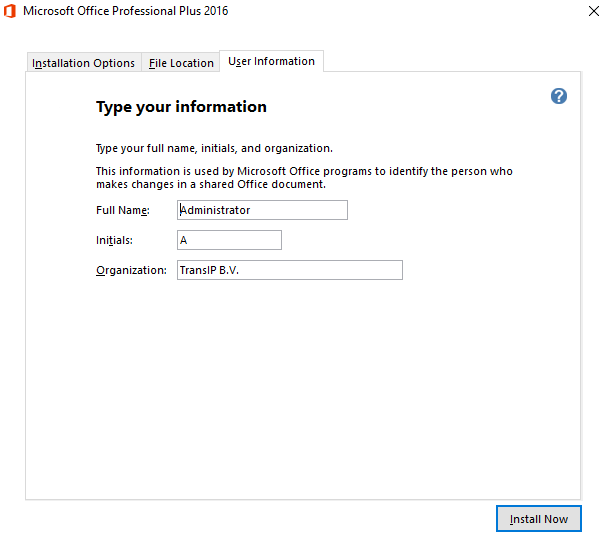
Adjust your personal information and click on 'Install now'.
Activating Office 2016
After installing Office 2016 it's recommended to immediately activate Office 2016. Otherwise you'll be prompted later that your Office 2016 installation has not yet been activated.
Step 1
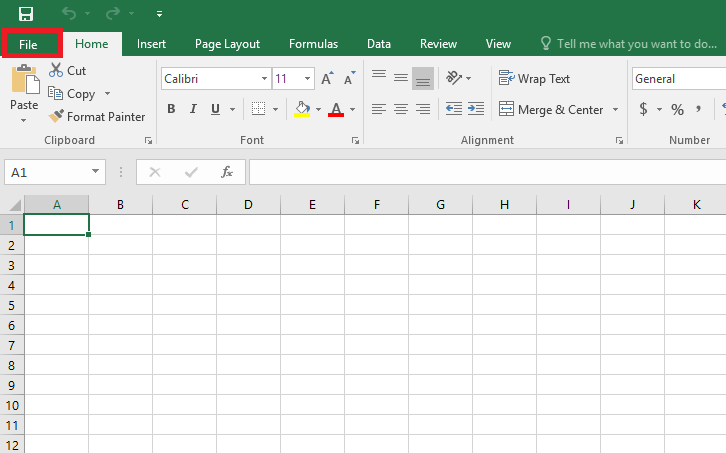
Open any of the Office products and click on 'File' in the top left corner. For this manual we use Excel, but the steps are identical for all Office products.
Step 2
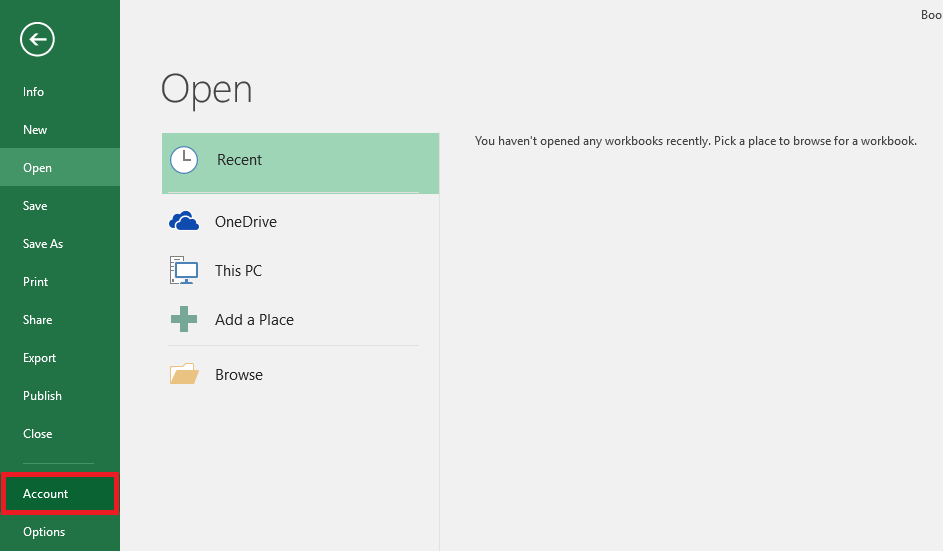
Click on 'Account' in the bottom left corner.
Step 3
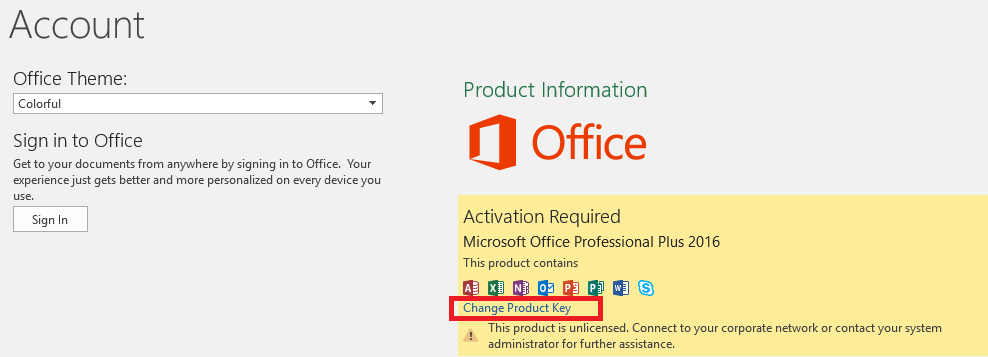
Next you'll see a warning message indicating that Office 2016 has not yet been activated. Click on 'Change Product Key'.
Step 4
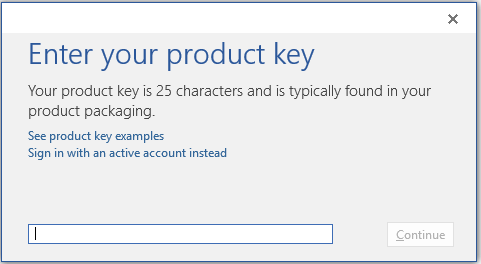
Provide your Office 2016 license key and clcik on 'Continue'. You've now finished activating Office 2016.
Should you have any questions left regarding this article, do not hesitate to contact our support department. You can reach us via the ‘Contact Us’ button at the bottom of this page.


