In this article we explain how to secure a folder on your website with a username and password by using the control panel. You can make several users and control which user has access to which secured folder.
We also explain how to secure a folder manually by using .htaccess and .htpaswd files.
Secure a map via your control panel
Step 1
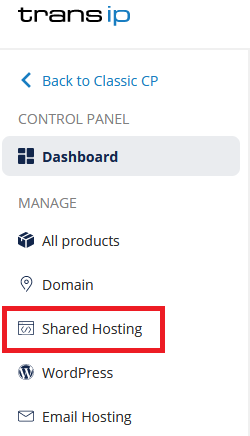
Log in to the control panel and click 'Shared Hosting' in the menu. Next, select your domain below 'Products'.
Click the 'Security' tab at the top and select 'Secure folders'.
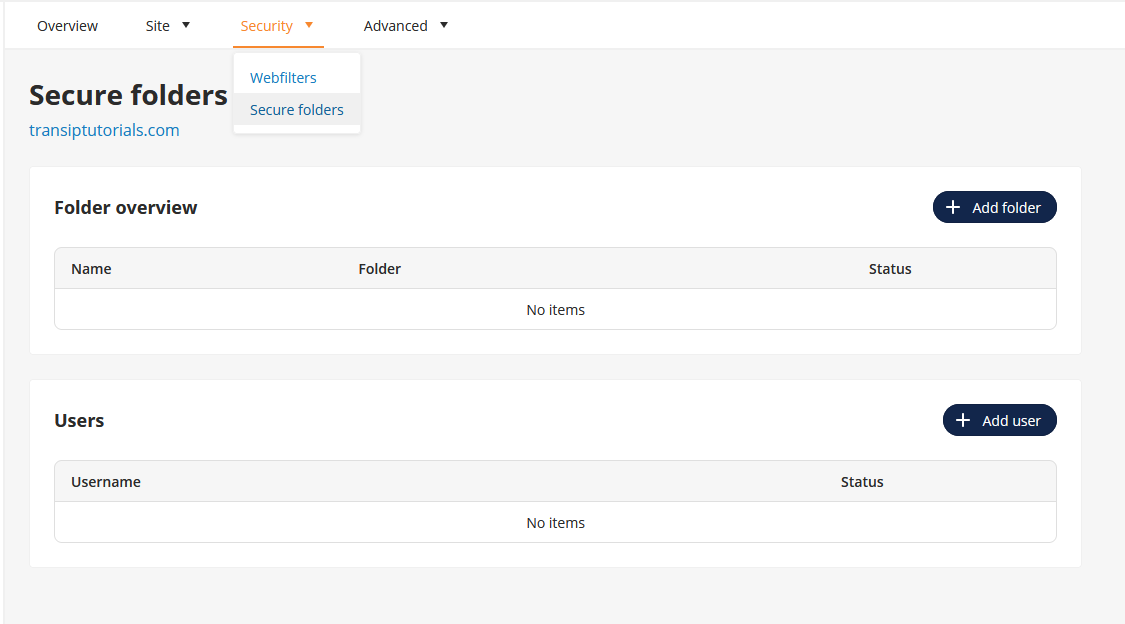
You can secure an existing folder here by adding it via the '+ Add folder' button on the right side of the screen. If you wish to add a folder that does not exist yet, create the folder first via the File Manager.
Once you have clicked the '+ Add folder' button, a window will pop up in which you can add the folder. Enter the name of the folder under 'Name', and the path to the folder under 'Folder'. In the example below we have secured the folder called 'admin' which is located in the 'www' folder.
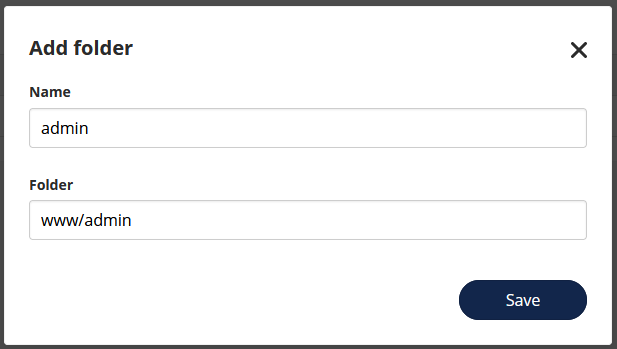
After saving you will notice you are unable to access the folder via the browser (yourdomainname.com/admin).
Step 2
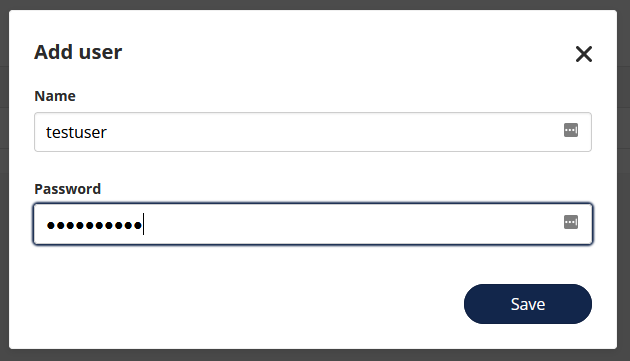
To be able to access the contents of the folder it is required to enter a username and password. You can create these by clicking the '+ Add user' button on the secure folders overview page in the control panel.
The window which will pop up allows you to create a username and password. In our example we have created the username 'testuser'.
Because you can secure several folders and create several users, it is important to designate users to the correct folders.
To do so, click the three dots next to the username and click 'Rights'. 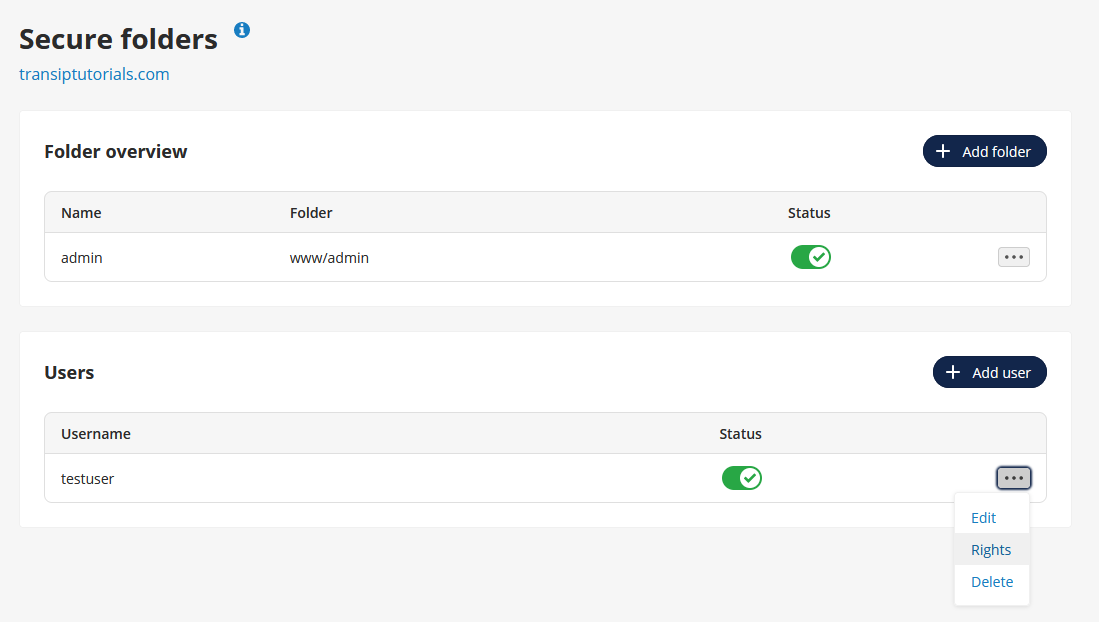
Check the folder(s) to which the user is allowed access. In our example we have given 'testuser' access to the 'admin' folder. 
You can also change the rights of a folder by clicking the three dots next to a folder and selecting 'Rights'.
Securing folders by using .htpasswd and .htaccess files
If you want to know more about the process of securing folders, you can choose to do this manually by creating a .htpasswd and .htaccess file and adding it to the folder you wish to secure.
Create a .htpasswd file first
In the .htpasswd file you enter the user name(s) and encrypted password(s) that are required to log on to (a specific part of) your website. Next, using SFTP, you upload the .htpasswd file to the directory of your website you want to secure.
If you want to secure your root website (for example transiptutorials.com), simply add the files we mention below in the root directory 'www'.
Step 1
Visit our .htpasswd generator and enter a username and password you want to secure the directory on your website with. Next, click 'Generate'.
In the image above you can see we used the username 'User1' and a password with 8 characters. After clicking the 'Generate' button, our password is encrypted and is shown in the grey box. Save the encrypted password and head over to Step 2.
Step 2
Now open a text file and enter the encrypted password you saved in Step 1. Save the text file with the name '.htpasswd' (the dot is not a typo). Make sure to select 'All files' next to 'Save as type'.
Step 3
Log in to the control panel and click 'Shared Hosting' in the menu. Next, select your domain below 'Products'.

Click 'File Manager' on the overview page of your hosting package.
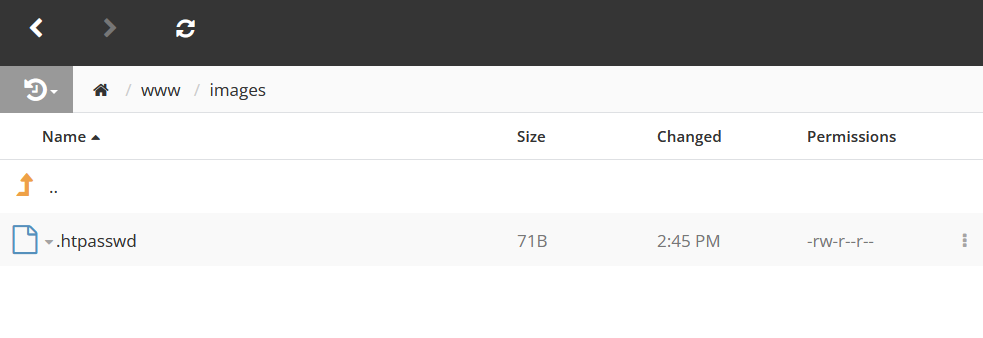
Navigate to the directory you want to secure and upload the .htpasswd file. Use the tutorial 'Using SFTP filemanagement in your control panel' for more information.
In our example below you can see we want to secure the directory 'images' which is located in the root directory 'www'.
Secure the folder by creating a .htaccess file
Now you've established which directory to secure, it's time to enable the actual password protection on this directory. We do this with the help of a .htaccess file.
Step 1
Open another text file and enter the following lines:
AuthName "Secured area"
    AuthUserFile /path/to/your/dir/.htpasswd
    AuthGroupFile /dev/null
    AuthType Basic
    require valid-user
It's important to enter the absolute path of your directory next to 'AuthUserFile'. We're using the directory 'images' in our example, which results in the following absolute path:
AuthUserFile transiptutorialscom
Replace transiptutorialscom with your own domain name without the dot, and replace the directory 'images' with your own directory that you wish to secure.
Step 2
Now save the text file as '.htaccess'. Make sure you select 'All files' next to 'Save as type'.

Step 3
Now head back to the 'File Manager' in your control panel. Navigate to the directory you want to secure and upload the .htaccess file here.
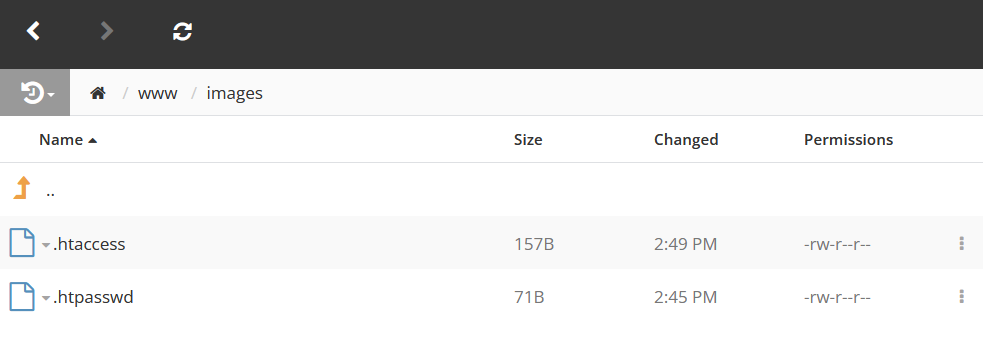
The next time you visit the secured directory, you will see a log in prompt. This page (and all its subdirectories) will only be accessible when the corresponding username and password are entered.
Take note: You need to enter the username and password you entered in the htpasswd generator. You do not enter the encrypted password here.
In order to grant access to multiple users, simply create additional users and passwords in the htpasswd generator. Enter the encrypted passwords in seperate lines, as shown in the example below.
Now save the .htpasswd file and upload it to the directory again using 'SFTP filemanagement'.


