The ports on a pfSense firewall are closed by default and there are no firewall rules, with an exception such as the 'anti-lockout rule' which ensures that you cannot create rules that will cause you to lose access to the pfSense web interface. In addition, there are a number of cases where pfSense itself creates firewall rules, for example when setting up an OpenVPN server.
There are plenty of scenarios imaginable why you would want to manually open more ports in pfSense. In this tutorial, we'll show you how opening ports in pfSense works.
Step 1
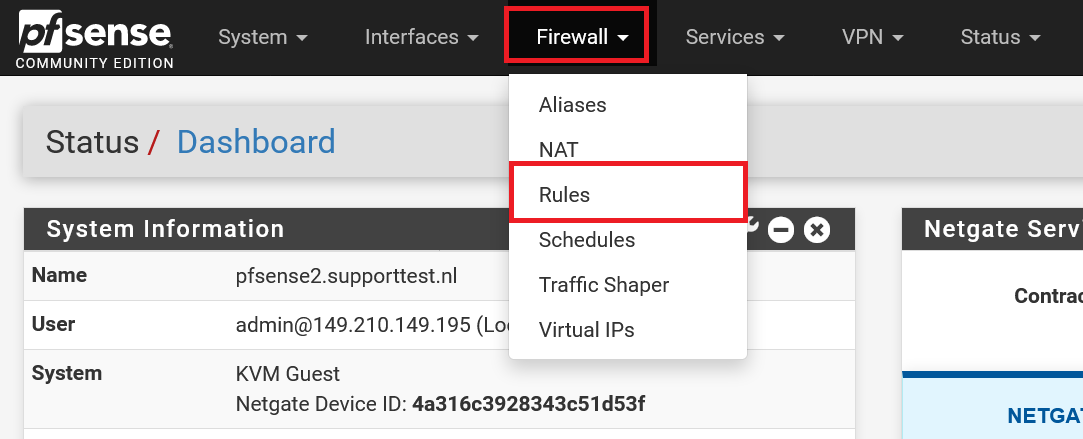
Log in to the pfSense web interface and click 'Firewall' > 'Rules' in the top menu.

Step 2
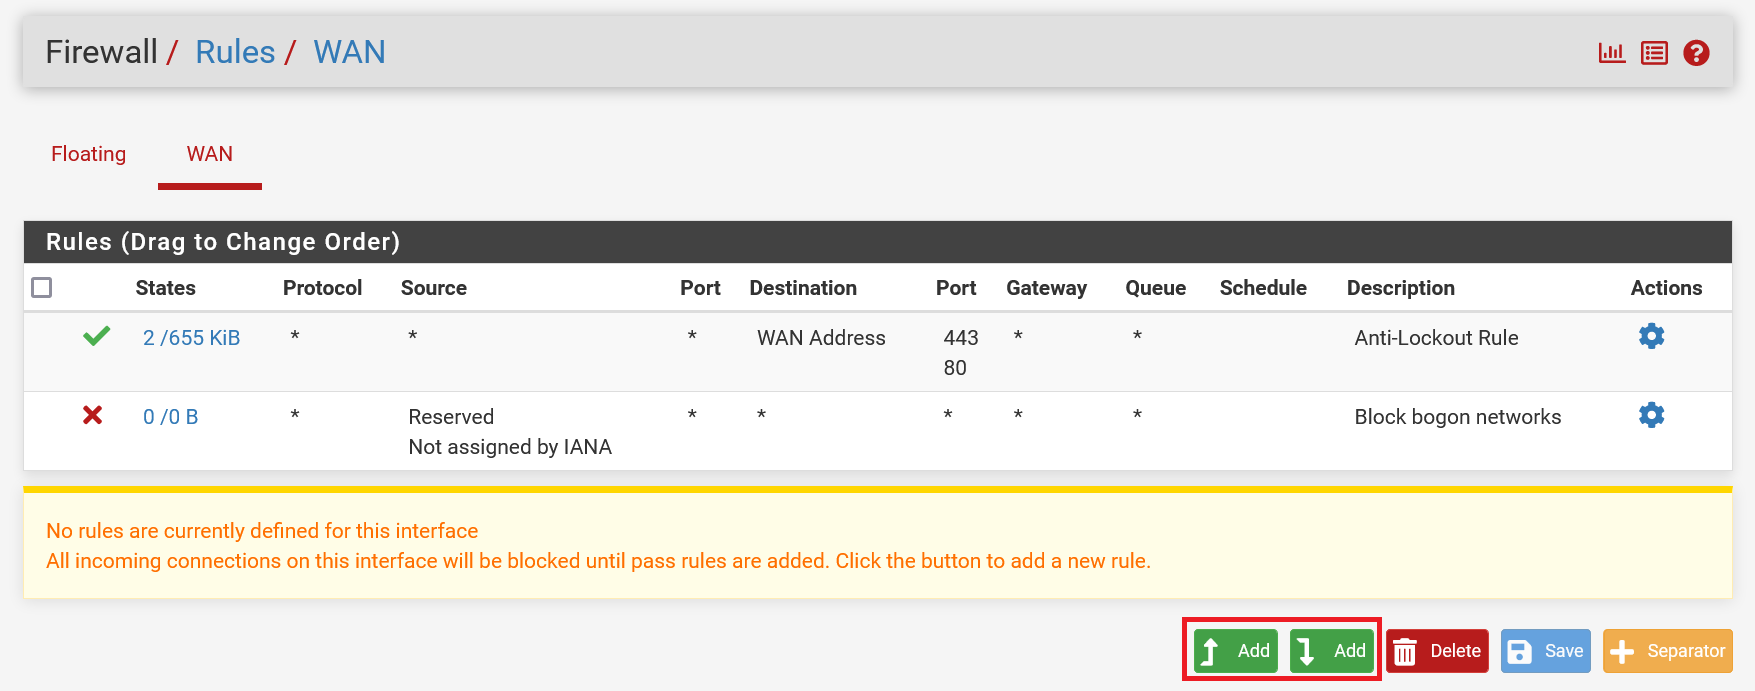
Click 'Add' to add a new rule. The left add button adds the rule above existing rules, the right one adds rules underneath.

Step 3
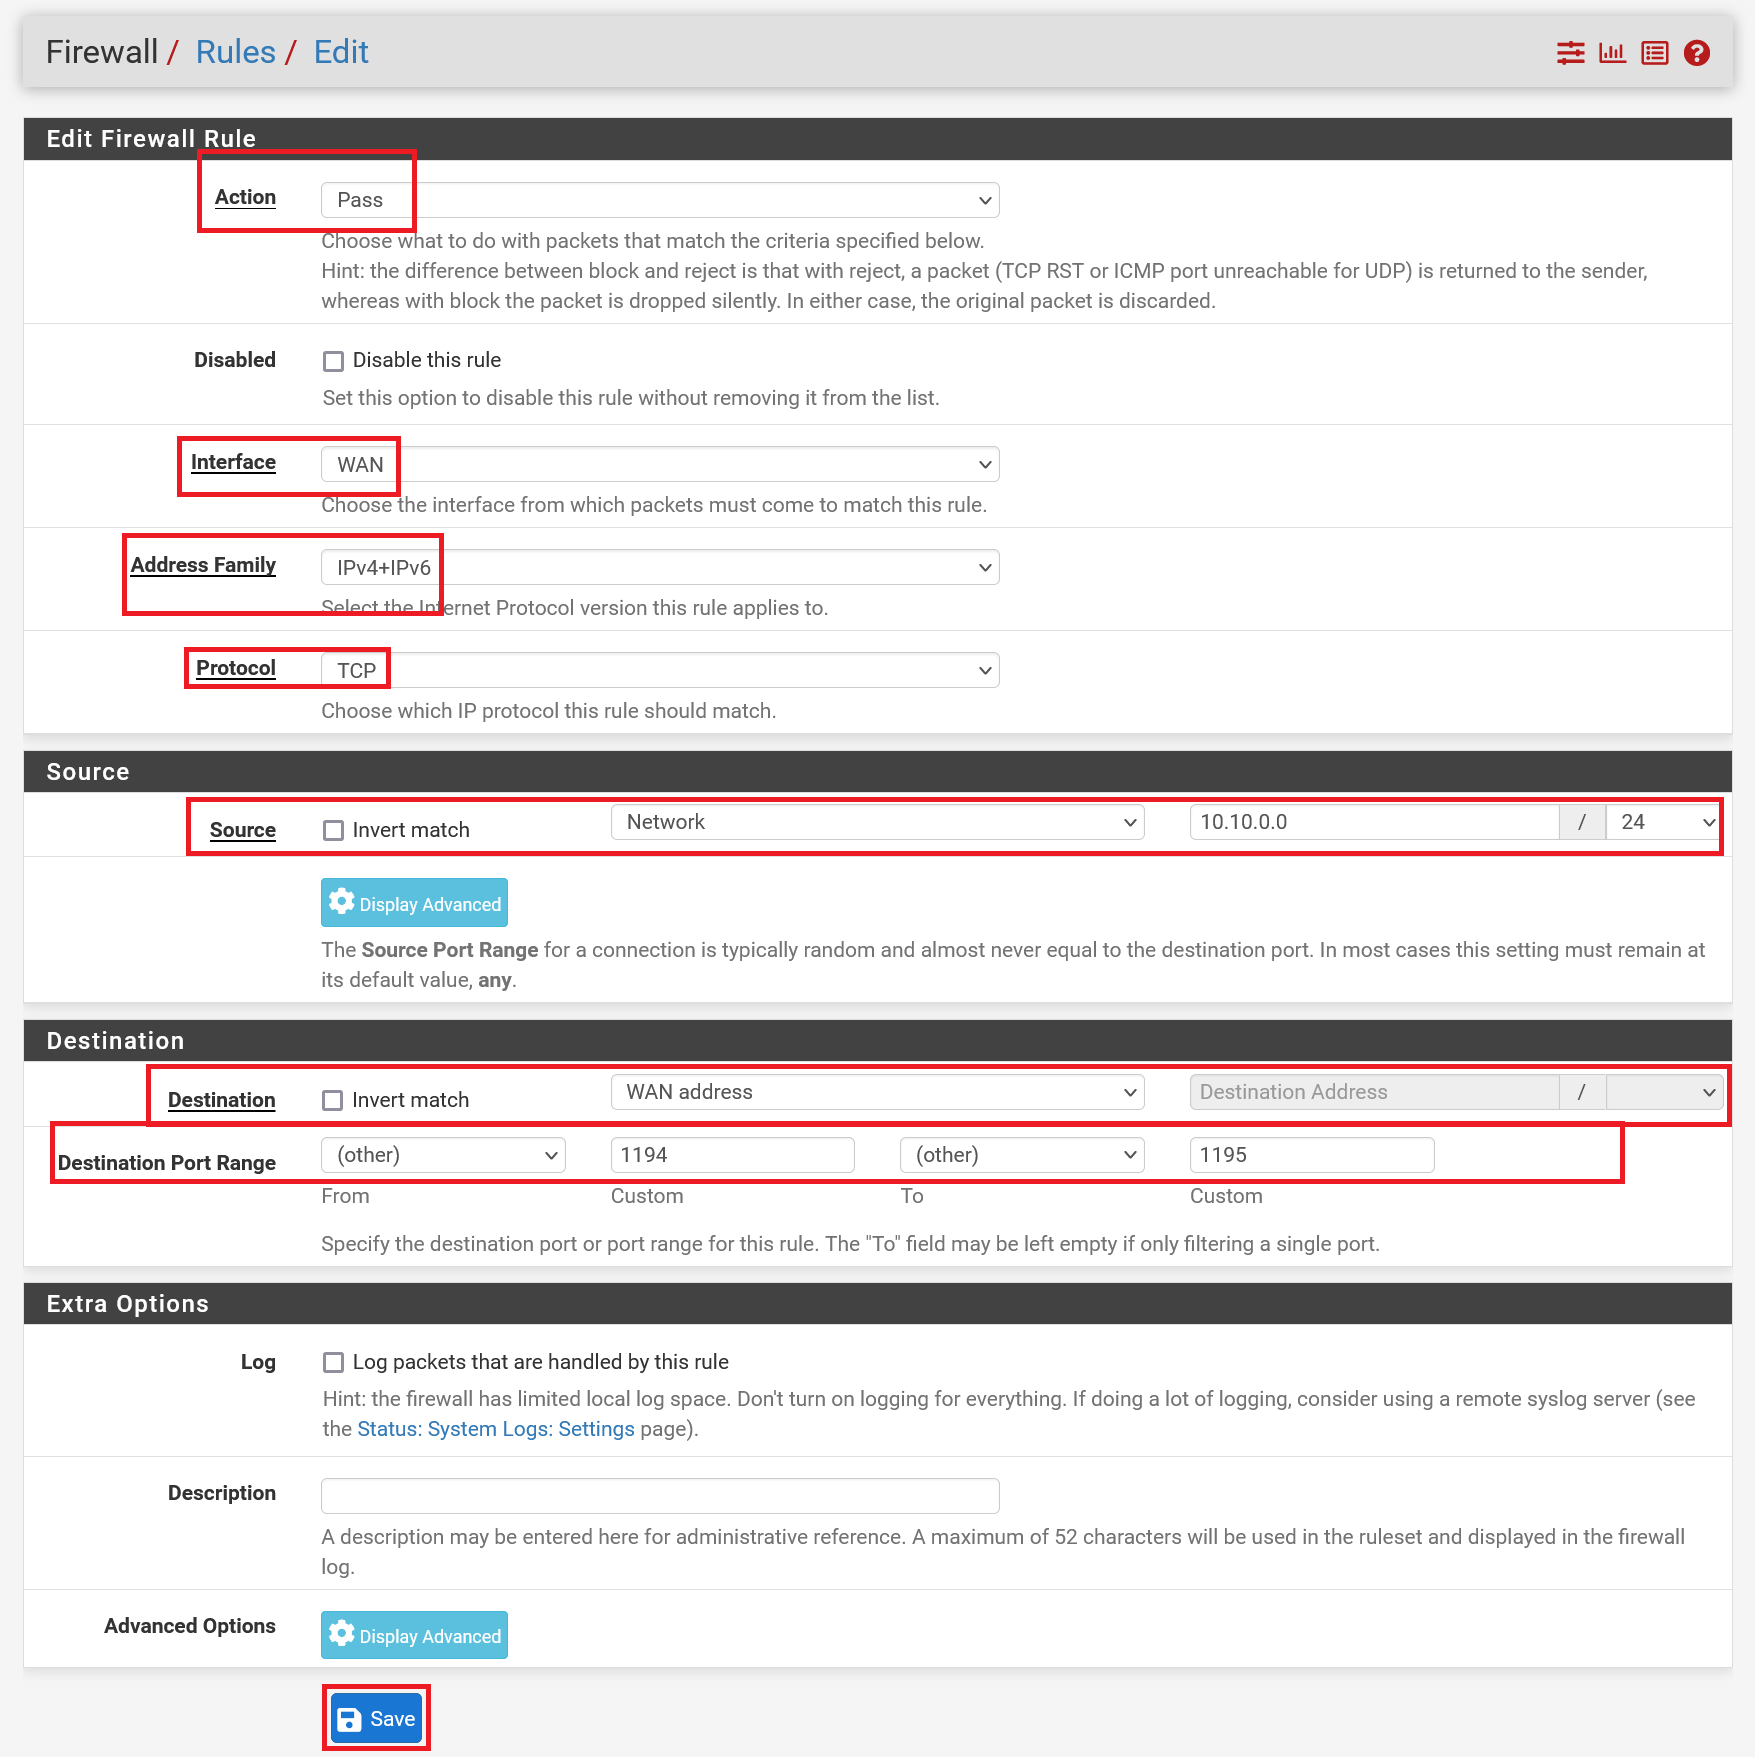
Fill in the new line as desired and click 'Save'. Below the screenshot we go through the most important options.

-
Action: By default, all traffic is stopped unless otherwise specified. Normally you always use 'Pass' here.
-
Interface: Indicates to which interface the traffic goes to which the rule applies. Incoming public traffic for which you want to set a rule falls under 'WAN' and traffic on a private network for which you want to set a rule falls under 'LAN'. In almost all cases you will choose 'WAN' here.
-
Address family: Indicates whether the rule applies to IPv4 and/or IPv6 traffic.
-
Protocol: Select the desired protocol to which the rule applies. Usually this is TCP and/or UDP.
-
Source/Destination: In our example we choose an option that allows traffic from a LAN/VPN connection with the IP range 10.10.0.0/24 to the WAN IP address of pfSense. You are free to choose and have the following options for both source and destination:
- Any: Any IP address is welcome
- Single host or Alias: Matches a single IP address or alias name. When this is active, an alias name may be typed in the Source Address field.
- Network: Uses both an IP address and subnet mask to match a range of addresses.
- PPPoE Clients: A macro that will match traffic from the client address range for the PPPoE server if the PPPoE server is enabled.
- L2TP Clients: A macro that will match traffic from the client address range for the L2TP server if the L2TP server is enabled.
- Interface Net: An entry in this list is present for each interface on the firewall. These macros specify the subnet for that interface exactly, including any IP alias VIP subnets that differ from the defined interface subnet.
-
Interface Address: An entry in this list is present for each interface on the firewall. These macros specify the IP address configured on that interface.
- Destination port range: The ports you want to open. If you want to open one port you only fill in the 'From' part and not the 'To' part.
This brings us to the end of this tutorial about creating firewall rules in pfSense.


