Eventhough we offer automatic backups on our webhosting packages, it is never a bad idea to manually make a backup of your website periodically.
In this tutorial we explain how to make a backup of the database of your website. We also explain how to place a backup back onto your webhosting package.
Attention! There is a connection between the files on your website and your database. Whenever you make a backup of your database, we strongly recommend to also make a backup of your website's files.
When you restore a backup of your database, it is possible that you also need to restore a backup of your website's files.
We explain how to make and restore a backup of your website files in this article.
Making a backup of your website's database
The database contains the data of your website and can be reached via MySQL. We will explain how to log in to MySQL first and then how to make a backup of your database.
Step 1
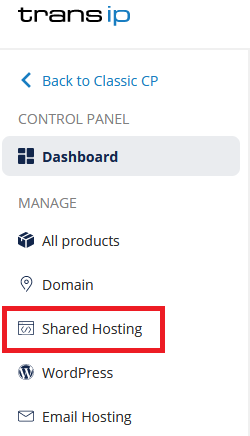
Log in to the control panel and click 'Shared Hosting' in the menu. Next, select your domain below 'Products'.
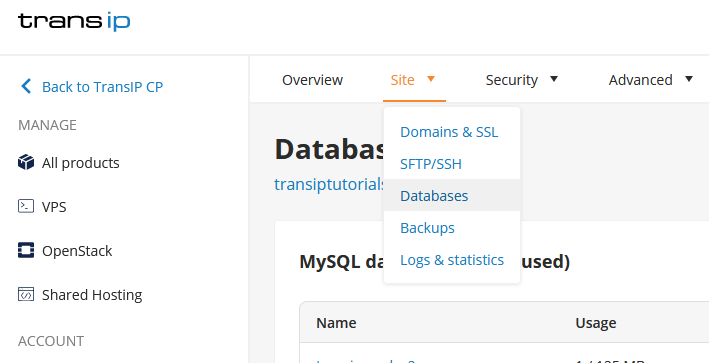
Click on the 'Site' tab and then 'Databases'.
Step 2
You will find an overview of your databases here. Next to the database name, the data usage and status are shown.
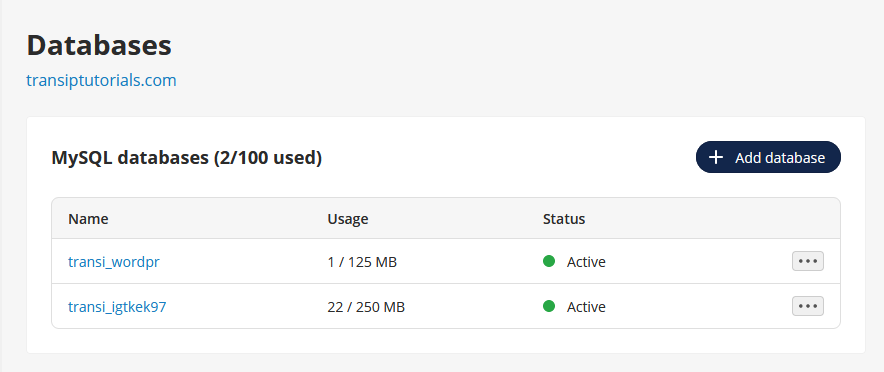
You can make a backup of your database directly via this page in the control panel. To do so, click on the three dots next to the database and click 'View backups'. You will now see an overview of your database backups. Click the 'Download' button to download the preferred backup.
If you want more advanced options when making your backup, follow the steps below.
Click the three dots next to the database and click 'Open phpMyAdmin' to automatically login to phpMyAdmin.
Step 3
When you are logged in to phpMyAdmin, you will see the screen as shown below. In this example we have installed WordPress, therefore the database that was made when installing WordPress is shown.
If you have uploaded a website and database yourself, you will see that data instead. The steps for making a backup are equal in both situations.
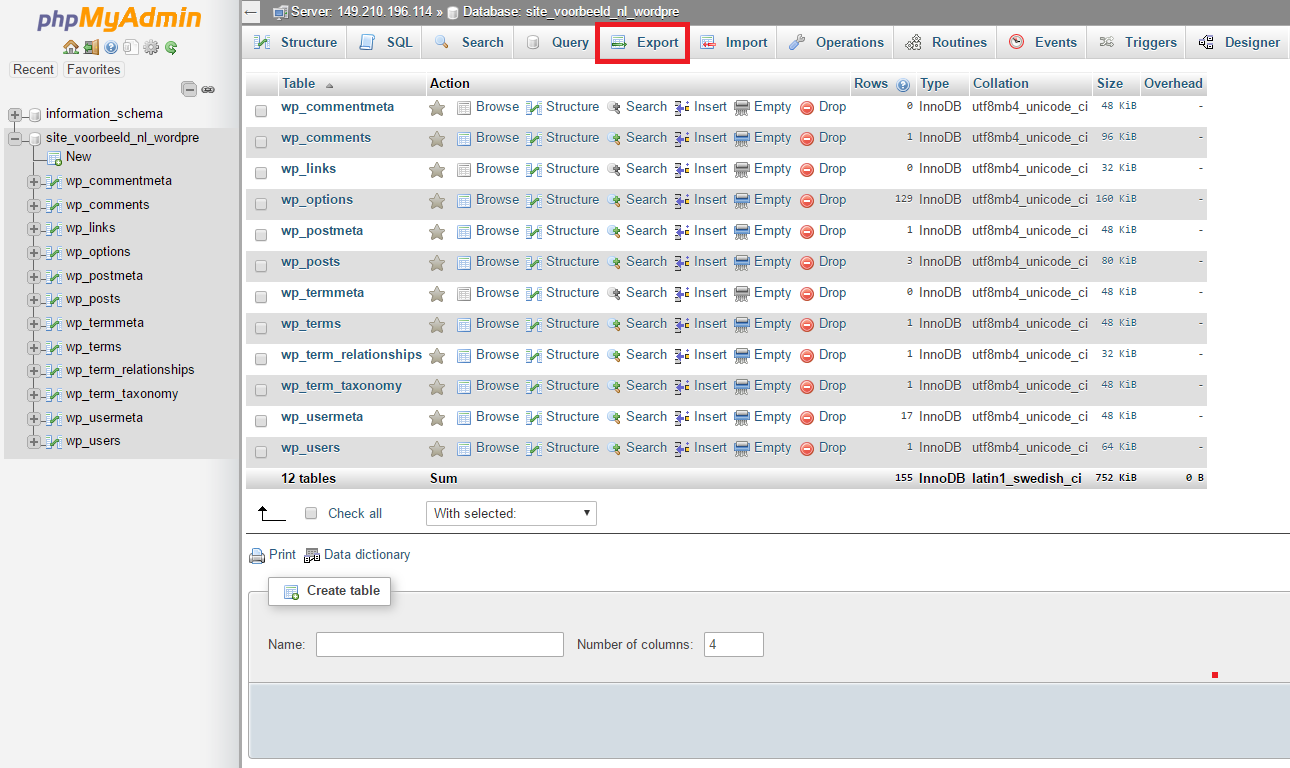
Make sure the database is selected by clicking it in the left column. Our database is called "site_voorbeeld_nl_wordpre". Click the 'Export' button, which is marked red in the image.
Step 4
You can now choose your Export method.
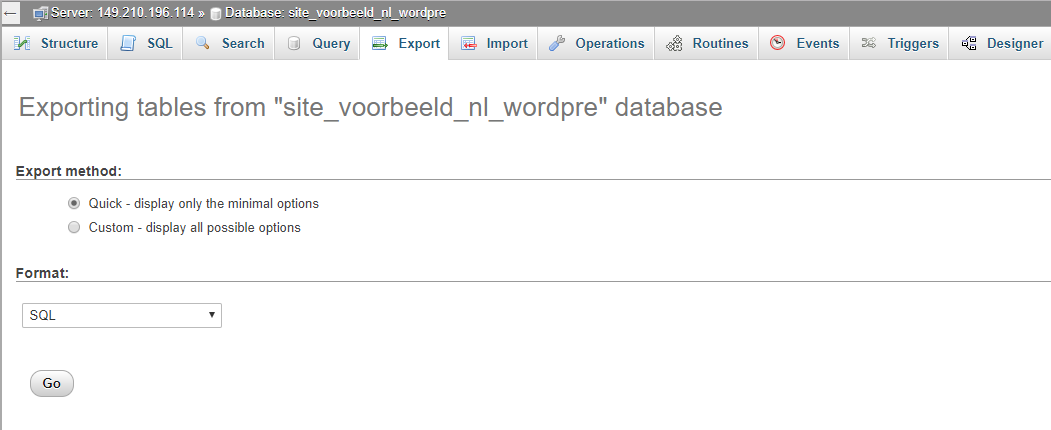
Pick the 'Quick' method and the 'SQL' format and click 'Go'. The backup will now be downloaded. Remember where you saved it, you may need it later.
Restoring a backup of your website's database
To restore an earlier version of your database, (for instance when you made a mistake which broke your database) follow the steps below.
Step 1
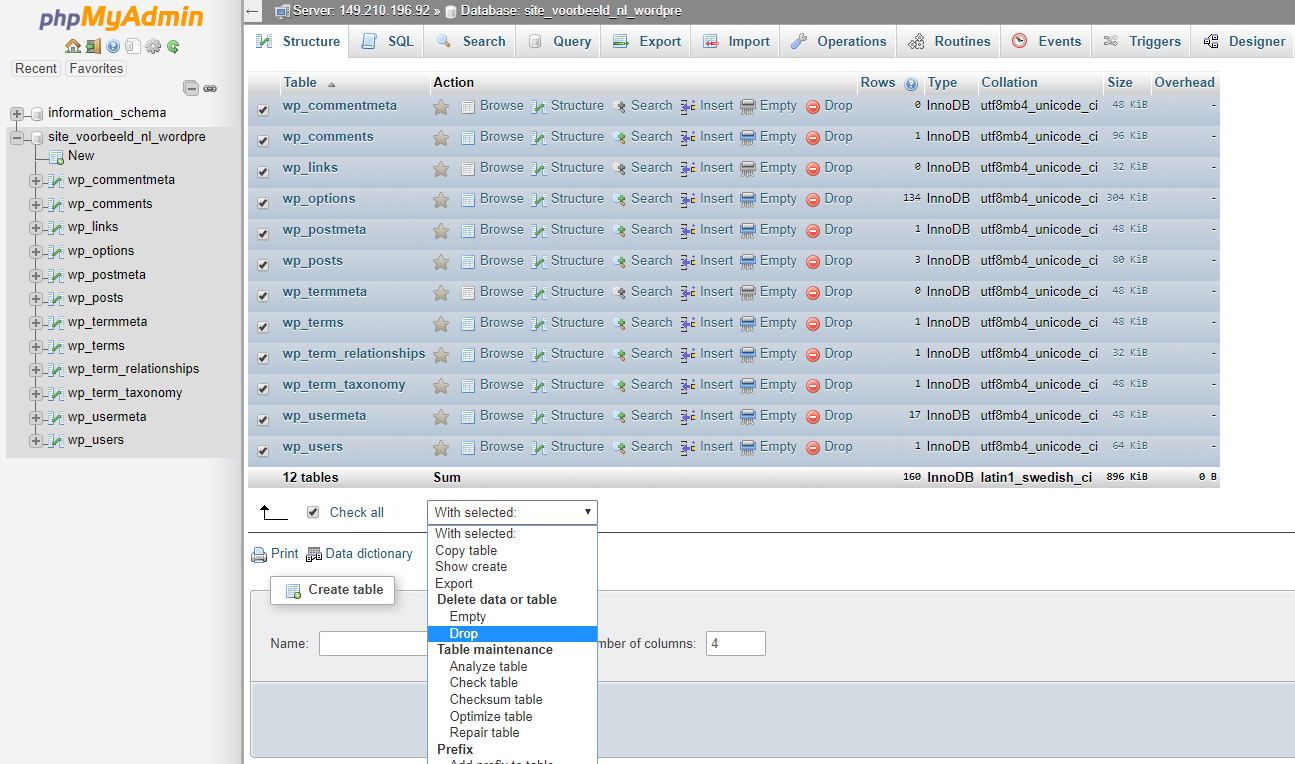
Log in to phpMyAdmin and select your database in the database overview. To be able to restore a backup it is important that your current database is empty.
To empty your current database, click on 'Check all' in the database overview.
Select 'Drop' in the drop-down menu which says 'With selected'.
Step 2
You will now be asked to confirm the action you took in the previous step. Click 'Yes'.

Step 3
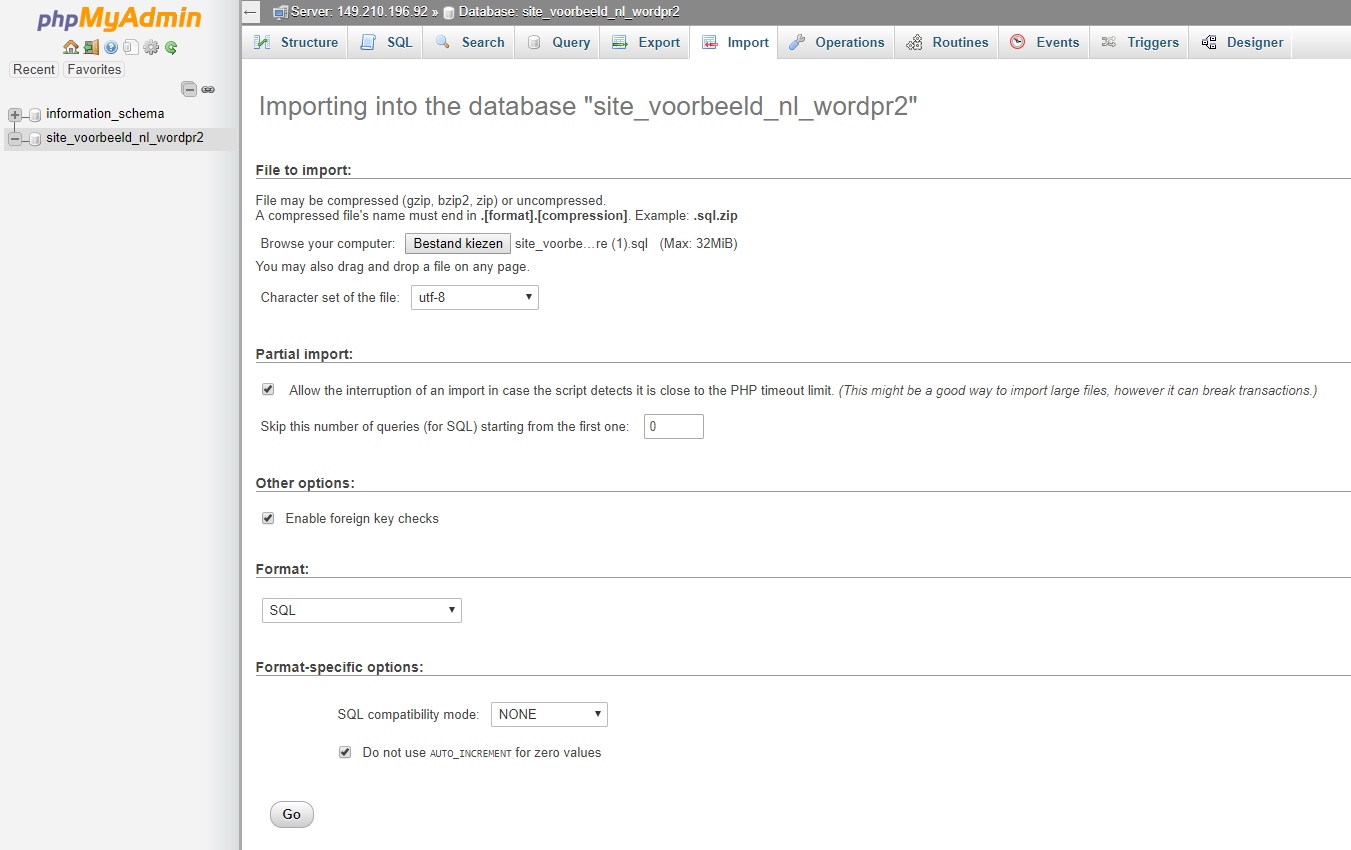
The database will now be empty and ready to receive the backup. Click the 'Import' tab and the button next to 'Browse your computer' on the next screen.
Look up the backup you made earlier. If you have used the download button in your control panel, you will have received the backup via e-mail.
Once you have selected your database, click 'Go'.
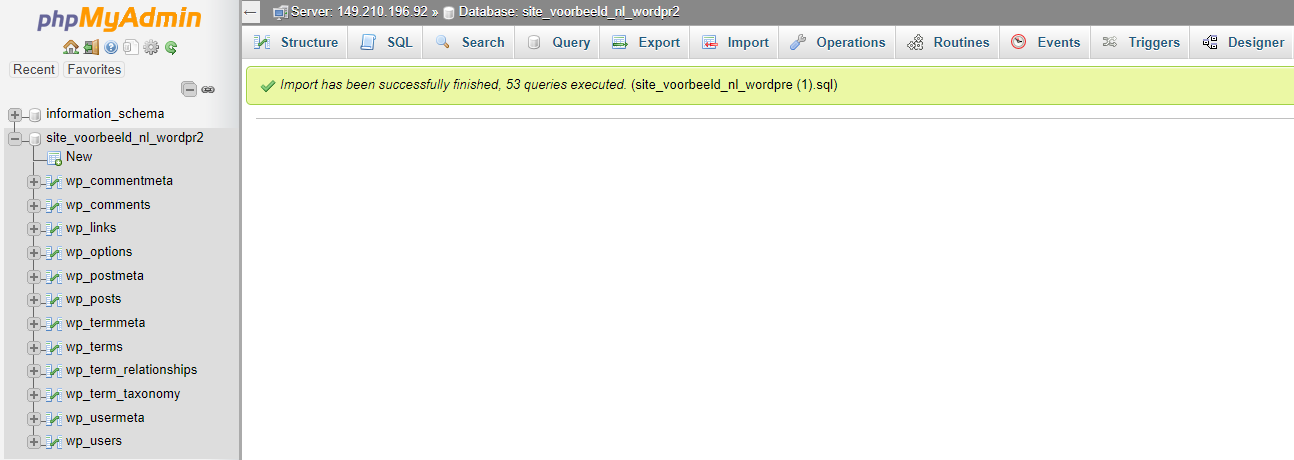
You will now see a confirmation that your database was imported succesfully.
If you have any questions regarding this article, please contact our support team. You can reach them using the 'Contact us' button below or via the 'Contact' button inside your control panel.


