


In this article we explain how to block or give access to visitors via their IP address. This can be useful when you want to stop people from visiting your website, or if you want to give only certain specific IP adresses access to (part of) your website.
Making an .htaccess file
You can influence the behaviour of (part of) your website using an .htaccess file. In this article we explain how to limit access to your website by using an .htaccess file.
To create an .htaccess file, create a text file on your computer. In this file you can add a few lines that determine which IP addresses can or can not visit your website. You can do this for individual IP addresses or complete IP ranges. After adding the lines, save the file by naming it .htaccess.
After saving the file, place the file in the folder in which it should do its job.
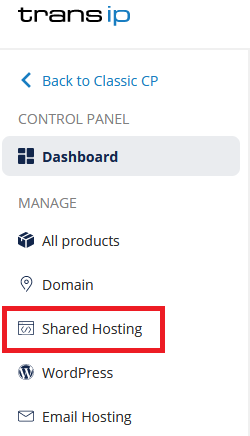
Log in to the control panel and click 'Shared Hosting' in the menu. Next, select your domain below 'Products'.
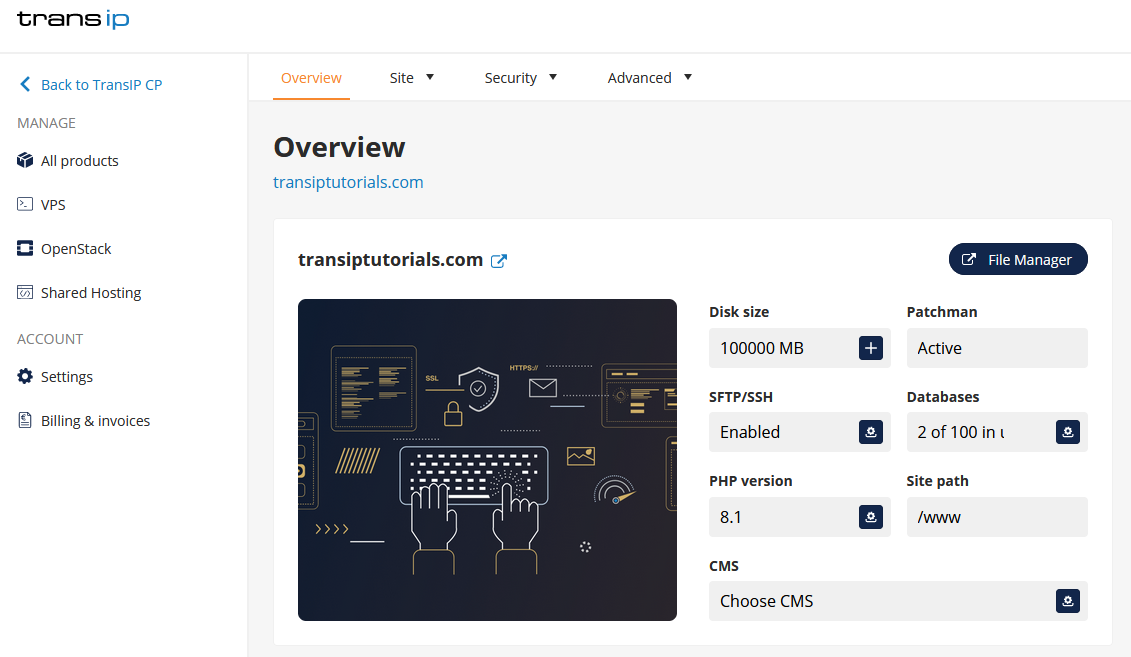
On the overview page, click 'File Manager' at the top right.
To use the .htaccess file for the root folder of your website (domainname.com), upload the .htaccess file to the www folder.
To use the .htaccess file for a subdirectory (such as domainname.com/example), upload the .htaccess file to the example folder within the www folder.
Do check the name of the .htaccess file after uploading; the file name should be .htaccess and not .htaccess.txt. You can easily change the name of a file via the File Manager. To do so, select the .htaccess file and click 'Rename...' to edit the name of the file.
Attention: There could already be an .htaccess file in your folder. In this case add the lines from this article to the existing file instead of making a new .htaccess file.
Check the access logs of your webhosting package
Malicious people may be attacking your website. This is usually done through a large amount of visits from one IP address, which will make your website very slow. You can check which IP addresses are causing this in the access logs of your website.
The access logs can be found via SFTP. In your control panel you can find the logs in the File Manager.
Log in to the control panel and click 'Shared Hosting' in the menu. Next, select your domain below 'Products'.
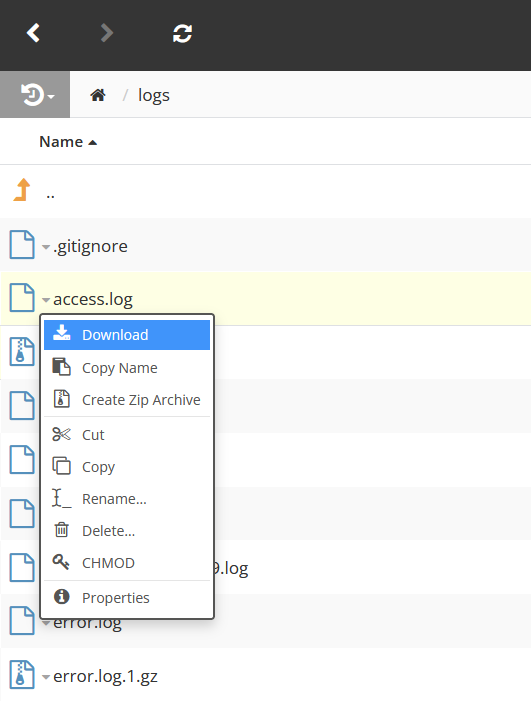
In the overview click 'File Manager' in the top right. Click the 'logs' folder and open the access.log file by selecting it and clicking 'Download'.
You will find the same IP address many times in case of a possible attack. This IP address can then be blocked by using the examples below.
Attention: It is likely that your own IP address shows up several times in the access logs, so make sure you do not block your own IP address. You can find your own IP address by entering 'what is my IP address' in Google.
Blocking specific IP addresses
To block IP addresses from your website, add the following lines to your .htaccess files.
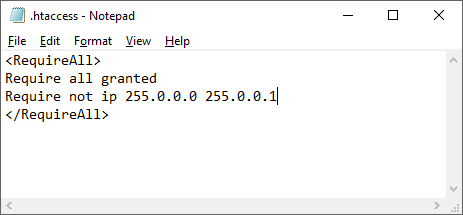
<RequireAll>
Require all granted
Require not ip 255.0.0.0 255.0.0.1
</RequireAll>In this example we have blocked the IP addresses 255.0.0.0 and 255.0.0.1 specifically. You can also enter more or enter just one IP address.
Blocking IP ranges
<RequireAll>
Require all granted
Require not ip 123.45.6
</RequireAll>
In the example above we have omitted the fourth set of numbers. This meas all IP addresses starting with 123.45.6 are blocked. You can add more IP ranges by adding them on the same line.
<RequireAll>
Require all granted
Require not ip 123.45
</RequireAll>
In the example above we have omitted even more (the third and fourth set of numbers). This blocks all IP addresses starting with 123.45. Do note that the more sets of numbers you leave out, the larger the scale of the block. So use with caution!
Giving specific IP addresses access
In the example below we want to block all access, but allow one or more IP addresses.
<RequireAll>
Require all denied
Require ip 255.0.0.0
</RequireAll>
The same can be done for ranges; leave out the last set of numbers to block IP addresses starting with 255.0.0.
You can add your own IP address here if you want to give only yourself access to your website. There are several ways to check your own IP address but the easiest way is to enter 'what is my IP address' in Google. You will then see your own public IP address.
Blocking specific domains
You can easily block specific domain names. In the example below we have blocked 'exampledomain.com'.
<RequireAll>
Require not host exampledomain.com
</RequireAll>