


An Active Directory (AD) is a 'directory service' for Windows networks (also known as a 'Windows domain'). This allows you to manage, for example, who has access to certain resources within the domain of a Windows network, like shared folders or Remote Desktop servers. The server that offers an Active Directory within a Windows network is called the 'Domain Controller' (DC). The DC authenticates and authorizes all users and computers within a Windows network.
To designate a server as a Domain Controller, the Active Directory Domain Services (AD DS) role must be installed on that server. In this manual, we will show you how to install Active Directory Domain Services and how to designate a server as Domain Controller.
Installing an Active Directory
Step 1
Connect to your Windows Server via Remote Desktop or the VPS console.
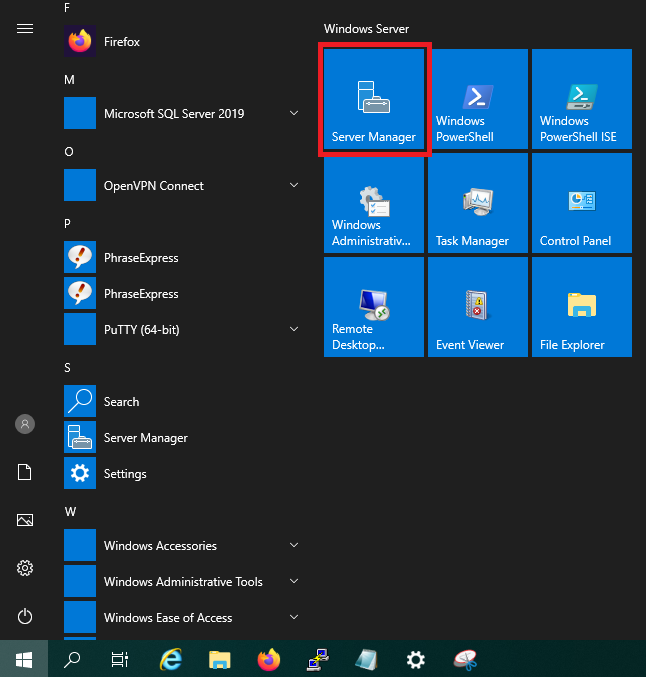
Step 2
Click the Windows Start button and then click 'Server Manager'.
Step 3
Click on 'Add roles and features'.

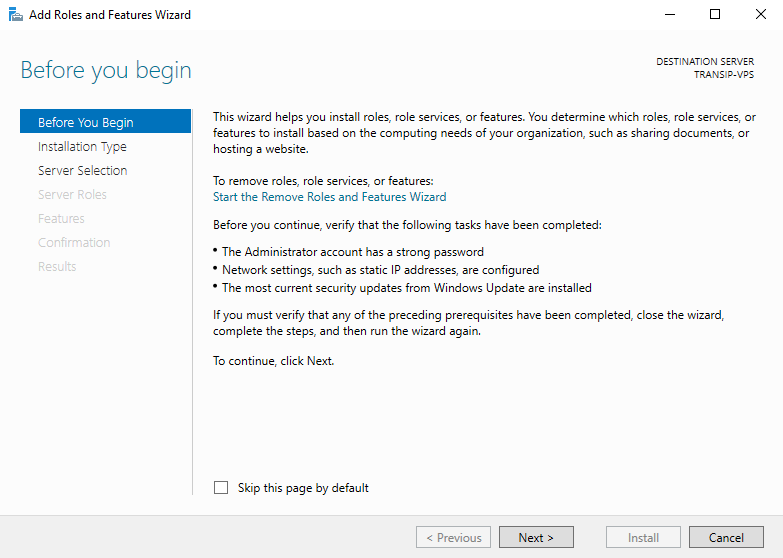
Step 4
You will now see the 'Before You Begin' page. Read this and optionally check 'Skip this page by default' to not see this page again when you add roles & features in the future. Click 'Next' after you have gone through the items under 'before you continue'.
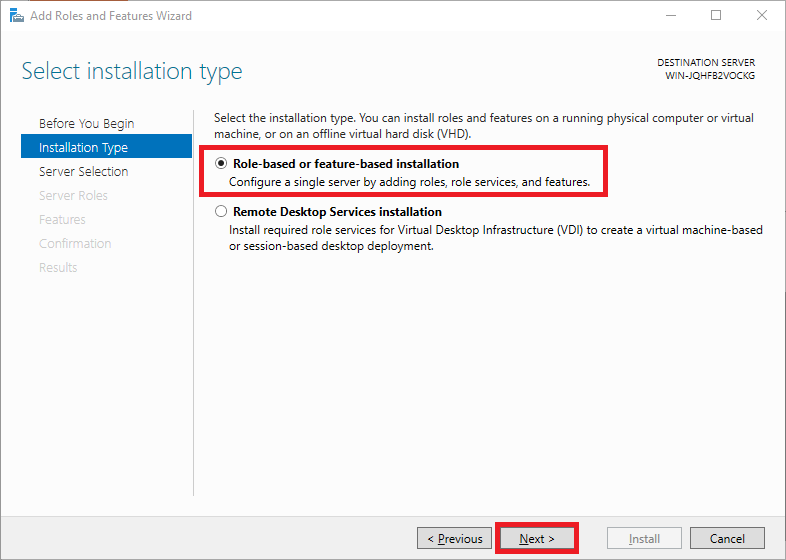
Step 5
Under 'Installation Type' you can choose from 'Role-based or feature-based' and 'Remote Desktop Services installation'. Choose 'Role-based or feature-based' and proceed to the next step.
Roles add software focused on specific tasks such as hosting websites to Windows Servers, features add extra functionality to that software.
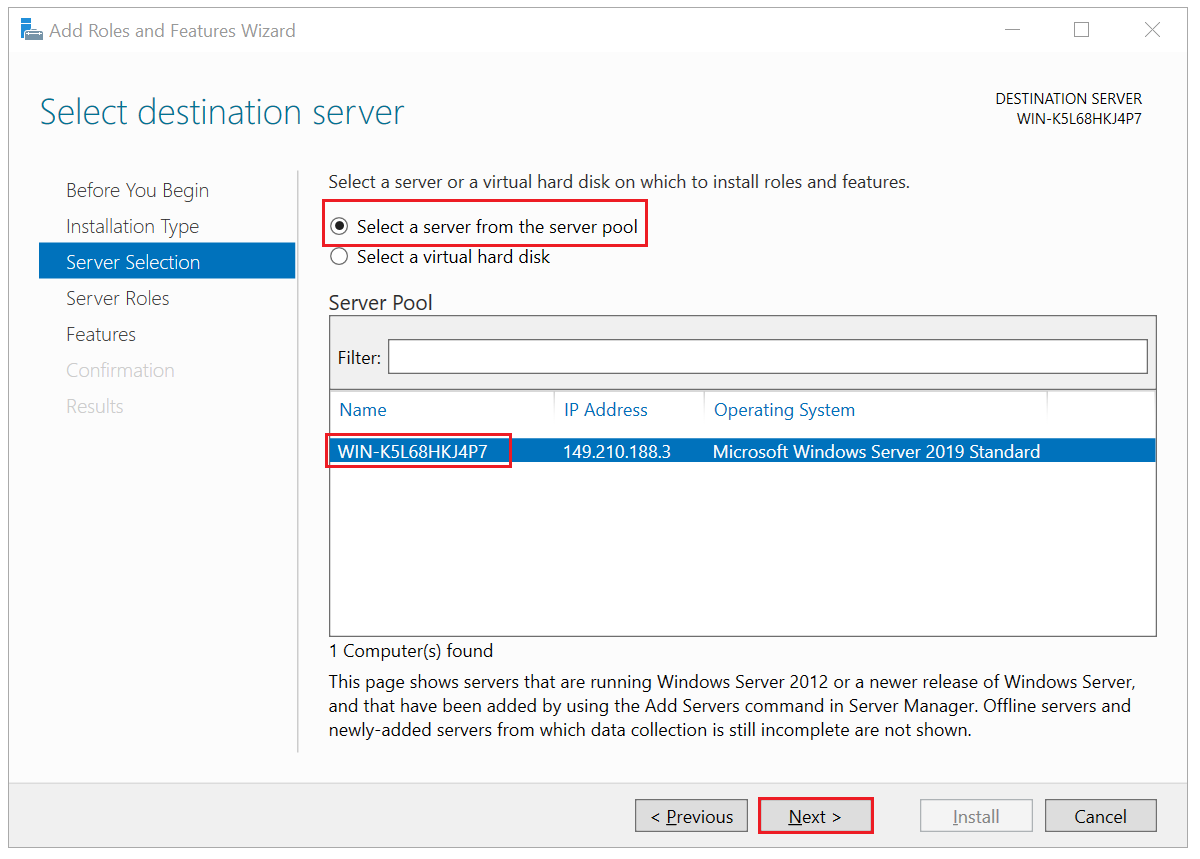
Step 6
Then choose which VPS you want to perform the installation on and click 'Next' to continue.
- We recommend that you do not use the chosen server for any other roles, except as a RD Connection Broker.
- By default, the VPS on which you will go through the installation will be selected. If you manage a server pool, select the server you want to use as Domain Controller.
Step 7
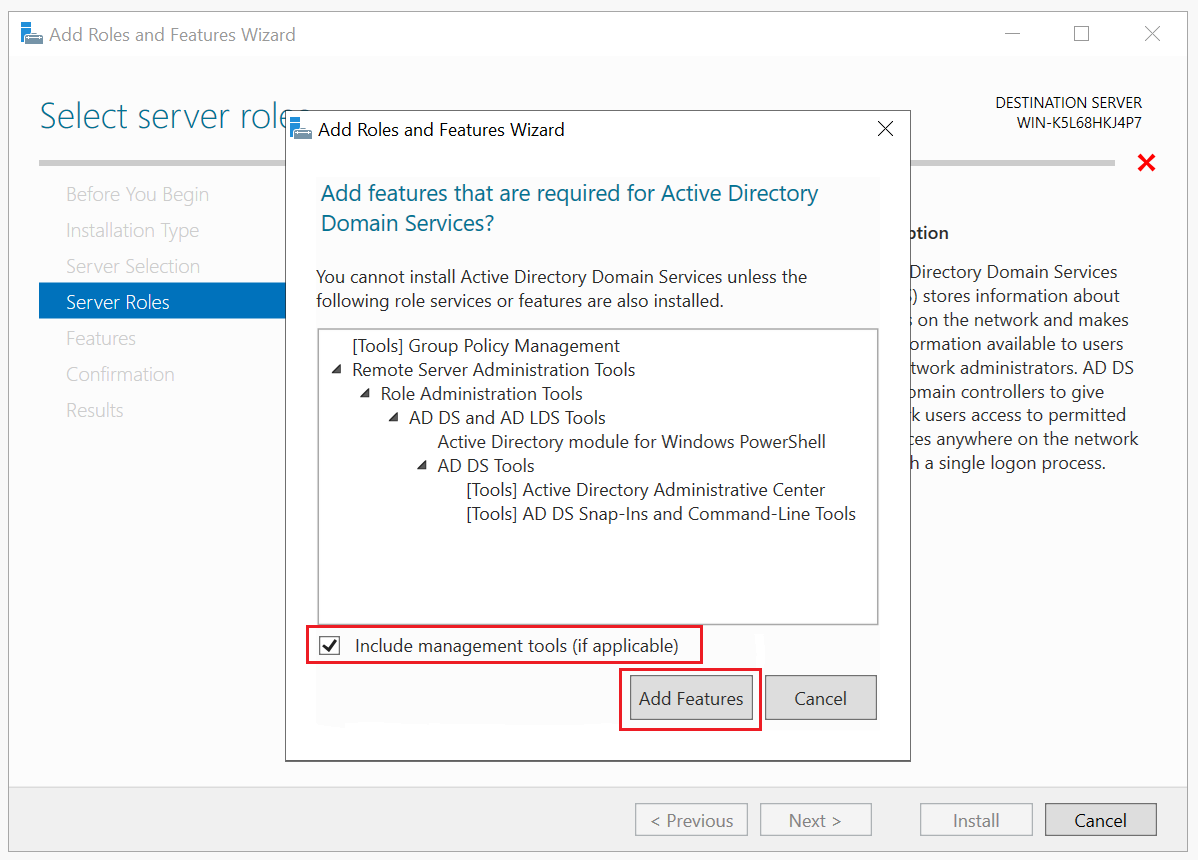
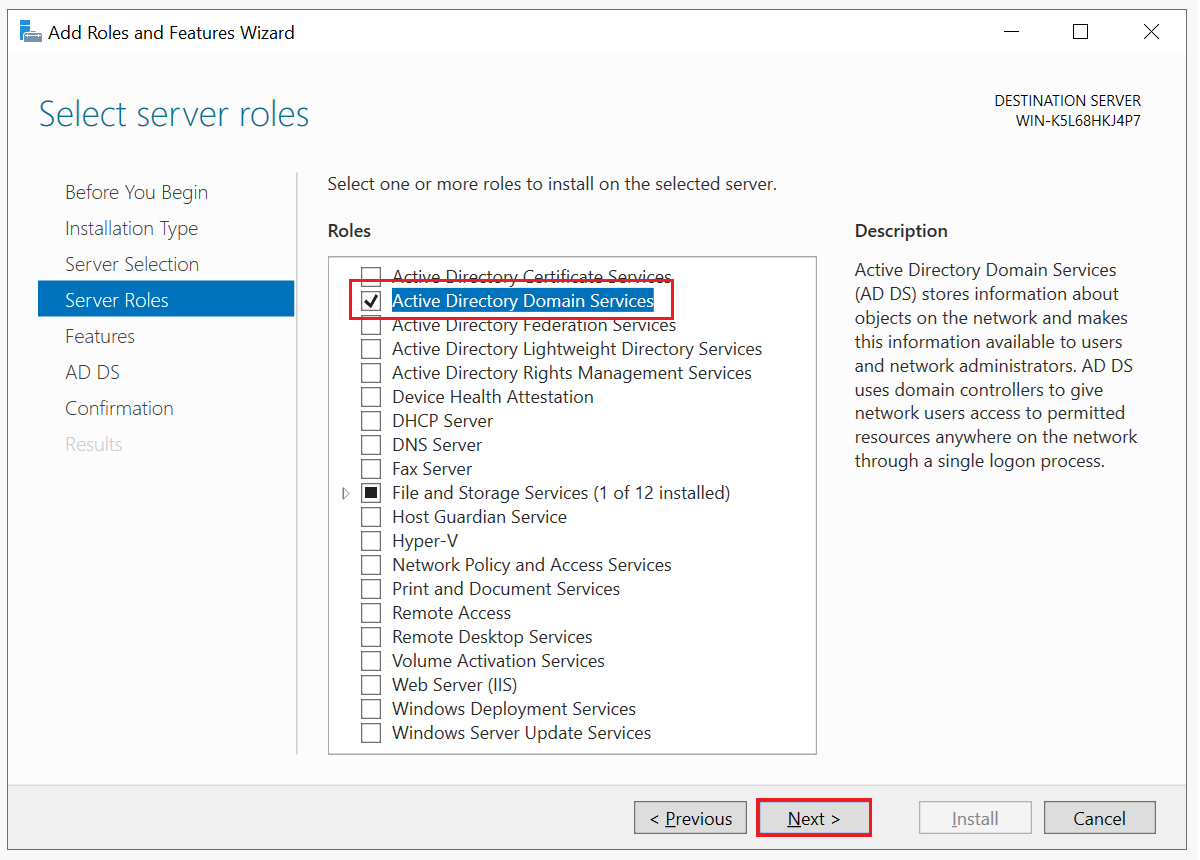
Check the box next to 'Active Directory Domain Services'. A window will appear asking you to install required features. Check if the option 'Include management tools' is checked and then click 'Add Features'.
The 'Active Directory Domain Services' option is now selected. Click 'Next' to continue.
Step 8
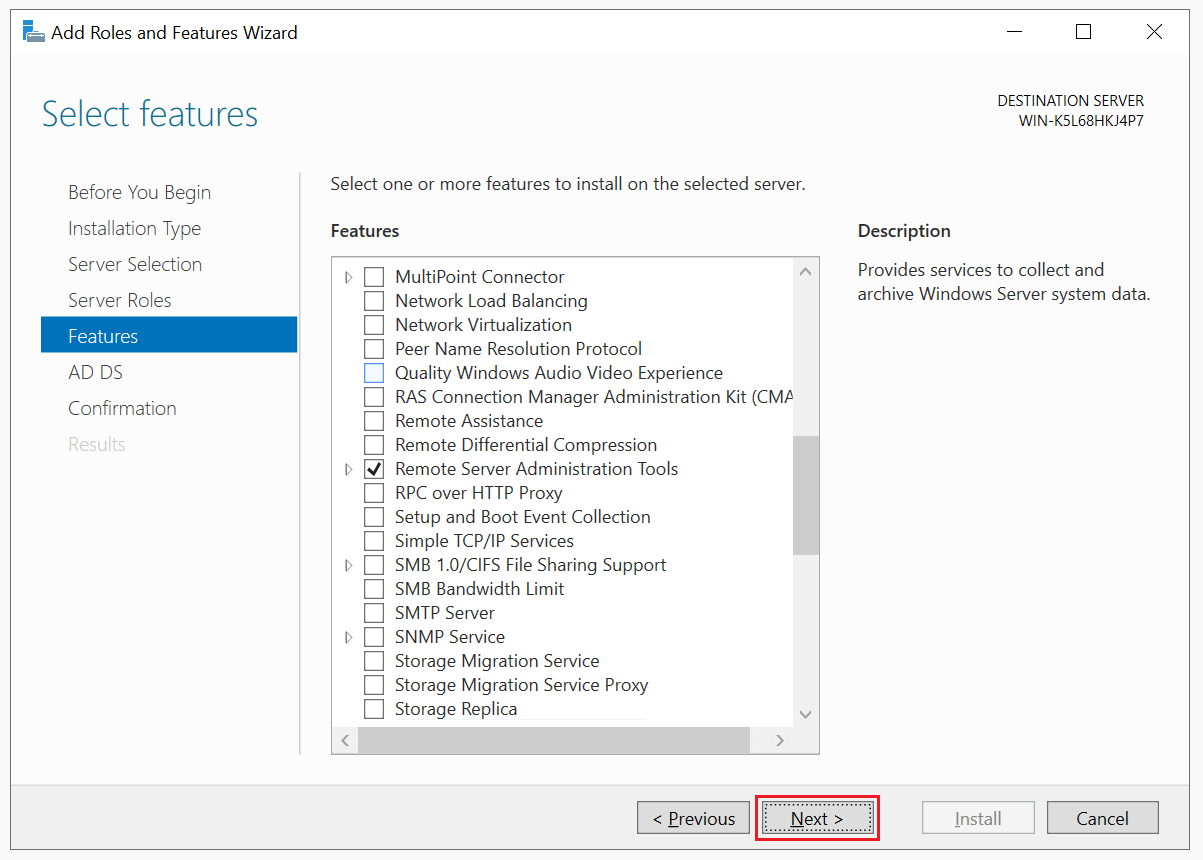
No additional features are required for normal operation of a Domain Controller. Therefore, do not select any optional features and click 'Next'.
Step 9
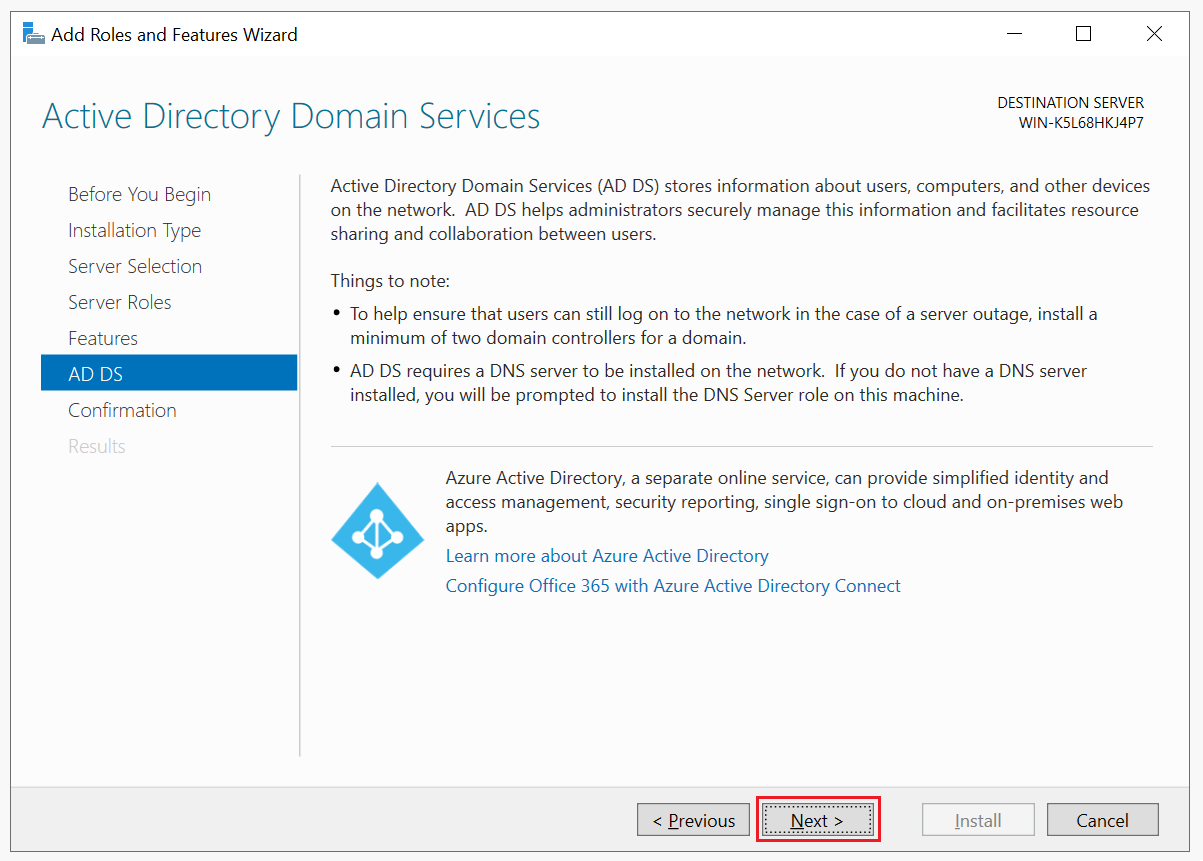
You are shown a screen with some general information and the option to purchase an Azure Active Directory service. Click 'Next' to continue and skip this offer.
Step 10
You will see an overview of the options you selected in the previous steps. Click 'Install' to start the installation.

You do not need to check the option 'Restart the destination server automatically if required'. The installation of an Active Directory does not require a reboot.
Step 11
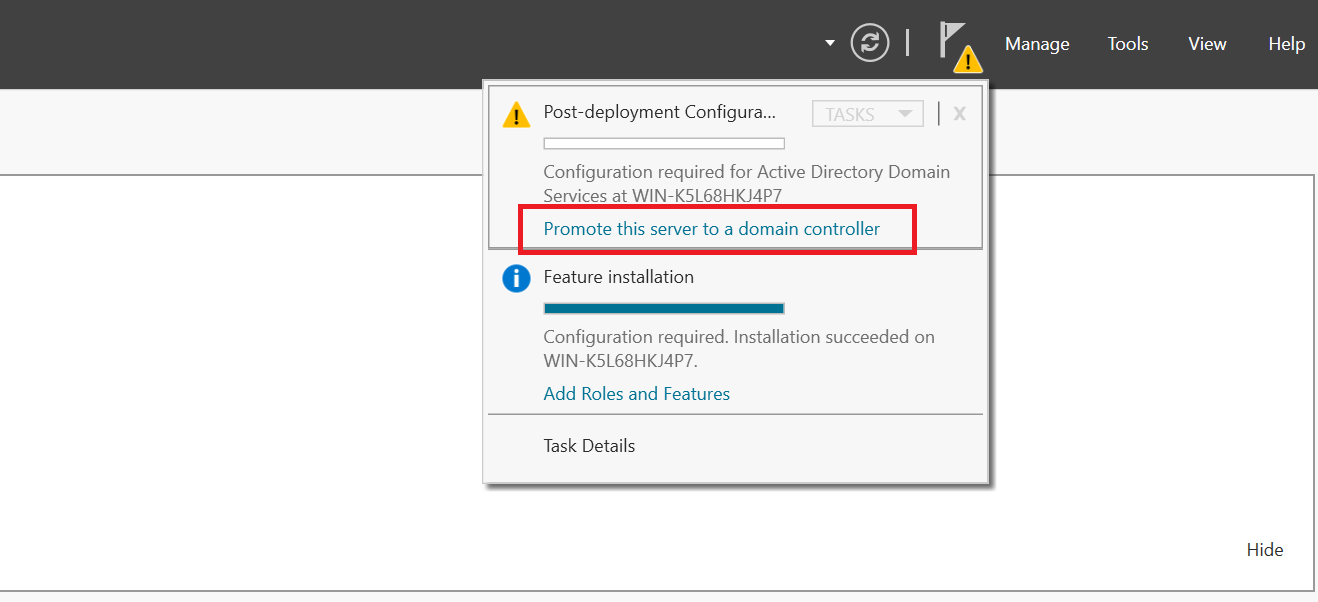
After the installation finishes, you will see a screen like the one below. As the message indicates, further configuration is required. Click 'Close' for now.

Step 12
You are now back in the Server Manager. At the top right you will find a flag below which notifications appear. There is now an exclamation mark because additional action is required. When you click this, you will see a notification 'Configuration required for Active Directory Domain Services'. Click 'Promote Server to Domain Controller' at this notification.
Below that you will also see that a Feature installation has been completed (that of the Active Directory) and additional configuration is required. You can ignore this message.
Step 13
Select the option 'Add a new Forest'. Enter the name of your domain in the box behind 'Root domain name'. For security reasons, we recommend using a local domain (a local domain can only be accessed via a private network), for example 'transip.local'. A malicious person cannot obtain any information about your private network because the DNS settings are not publicly available.
After entering your domain name, click 'Next'.
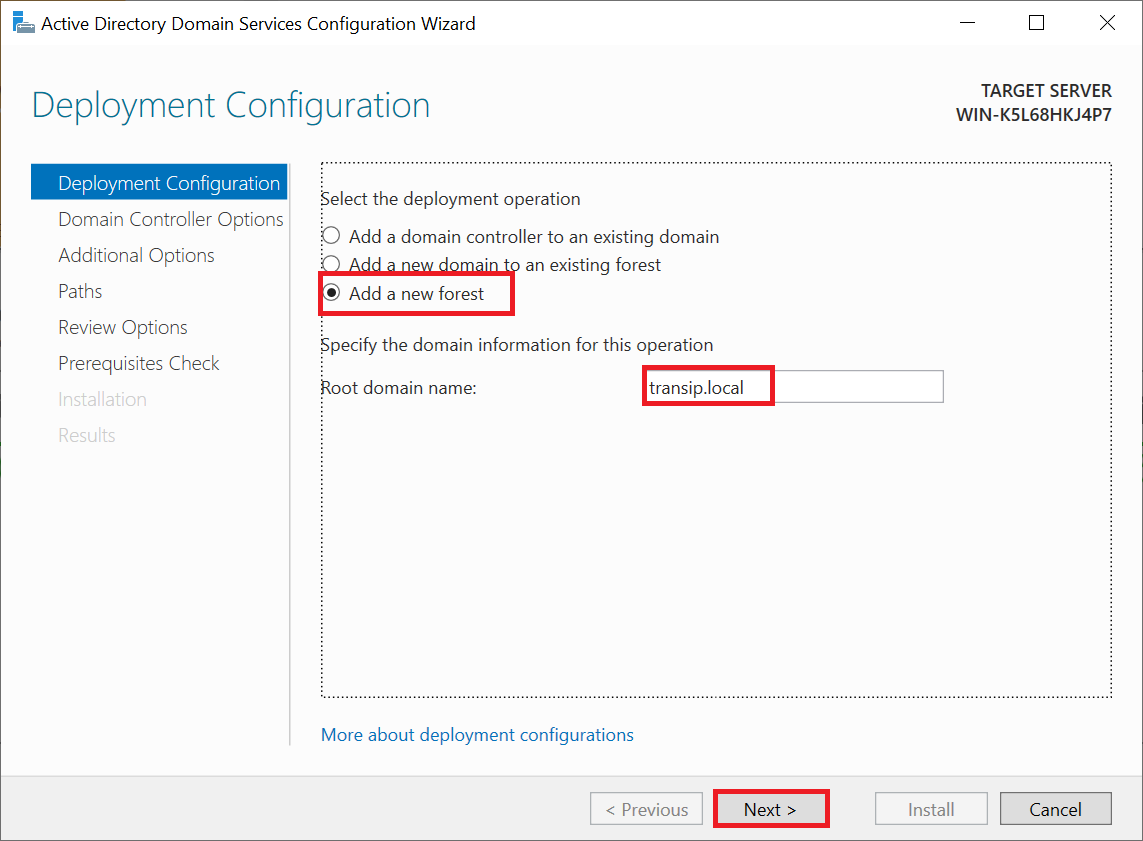
An Active Directory can contain multiple domains. This collection of domains is called a 'forest'.
The use of domains by an Active Directory is the reason that one speaks of a Domain Controller, Active Directory Domain Services, and Windows Domain for example.
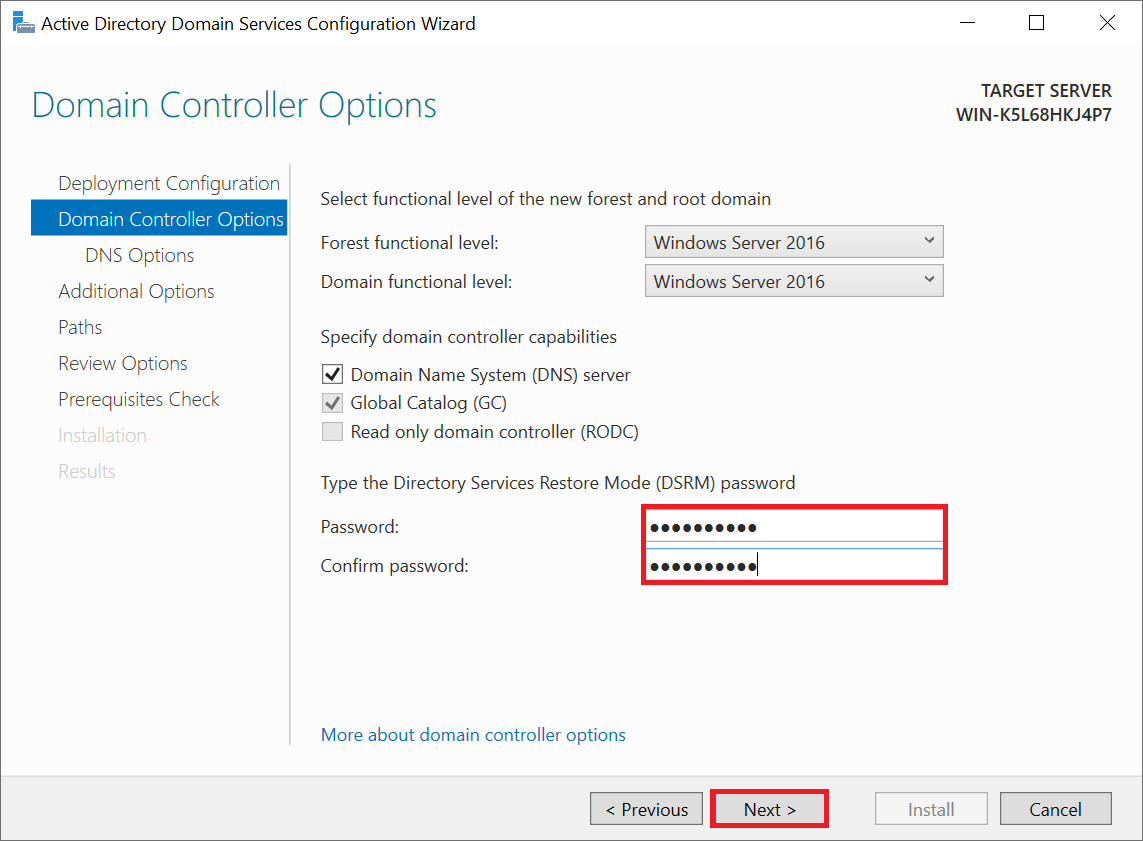
Step 14
In the 'Domain Controller Options' screen, enter a password and click 'Next'. This password is for the 'Directory Services Restore Mode'. DSRM is a maintenance mode with which backups of Active Directory objects can be restored.
You do not need to adjust the Domain and Forest functional level and will be set to 'Windows Server 2016' (for Server 2016, 2019 and 2022). Enter a DSRM password and repeat it (this password will be used if you want to roll back the entire process).
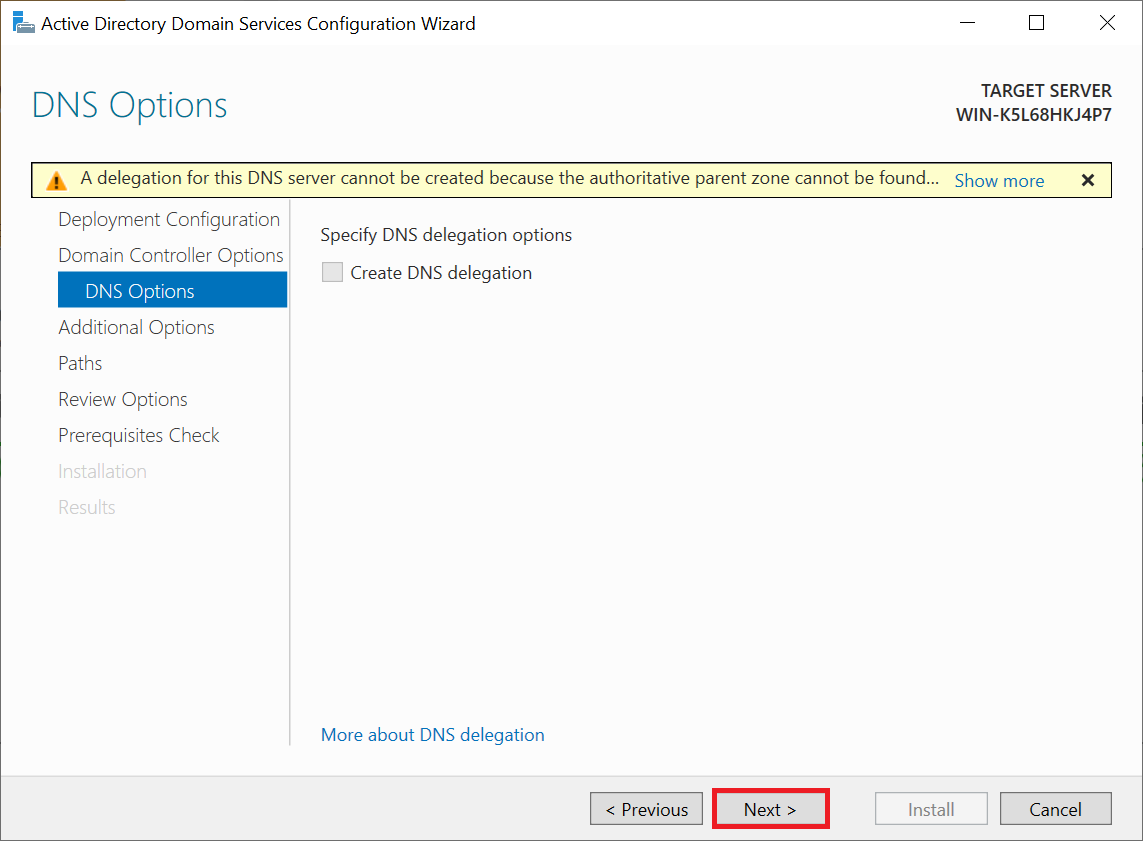
Step 15
You will now see a DNS warning in the 'DNS Options' screen. This warning is due to the fact that it concerns the first Domain Controller of your new Windows Domain. You can safely ignore this warning.
Click 'Next' to continue.
Step 16
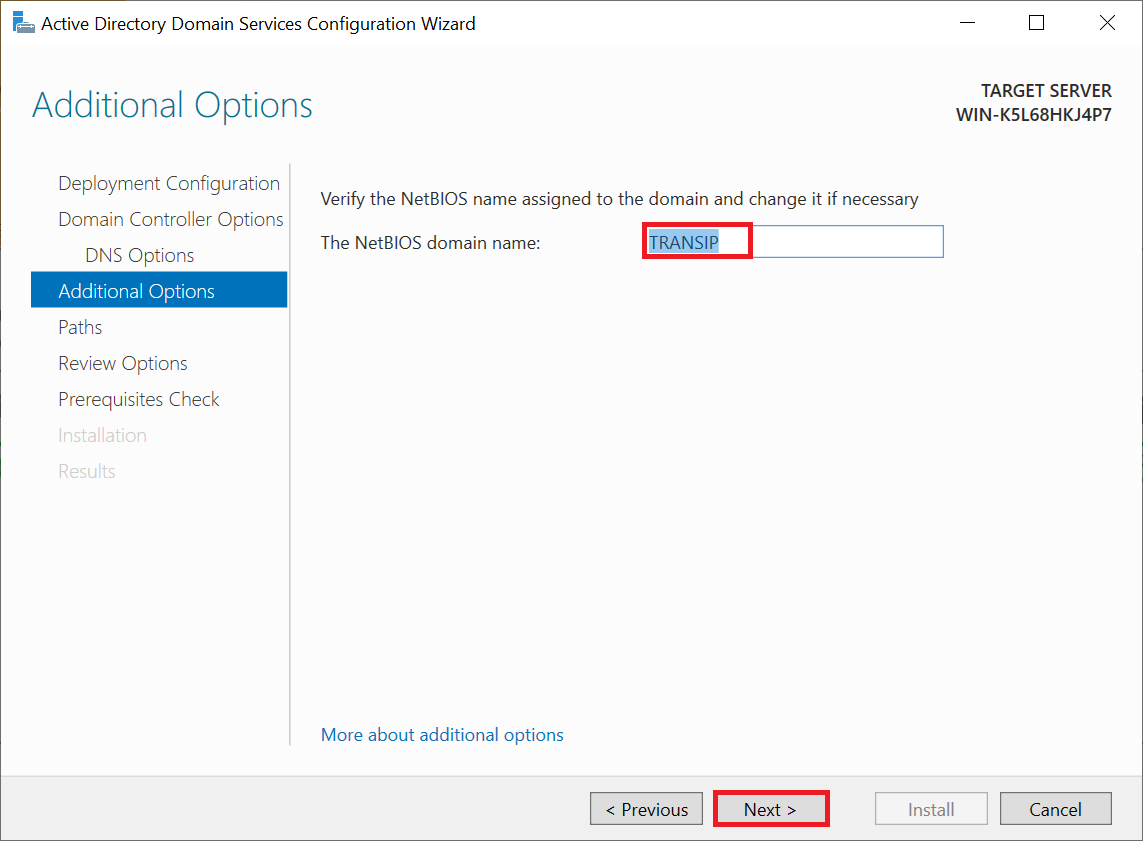
You do not need to change the NetBIOS name as already provided. You are however allowed of course to optionally change the name to another name of up to 15 characters (in capital letters).
Step 17
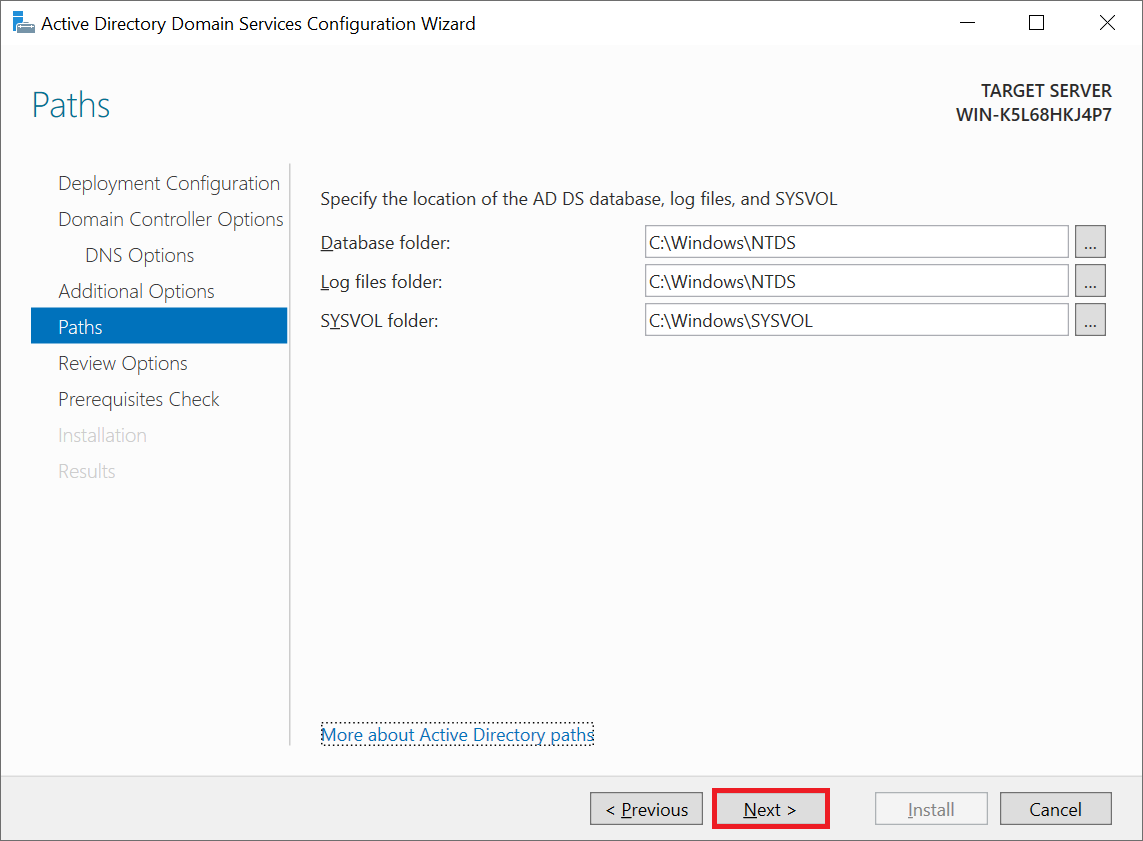
In the 'Paths' screen, click 'Next'. There is no need to modify the database, log file or SYSVOL directories.
Step 18
You will now see an overview of the options you selected in the previous steps. Click 'Install' to start the installation.
Step 19
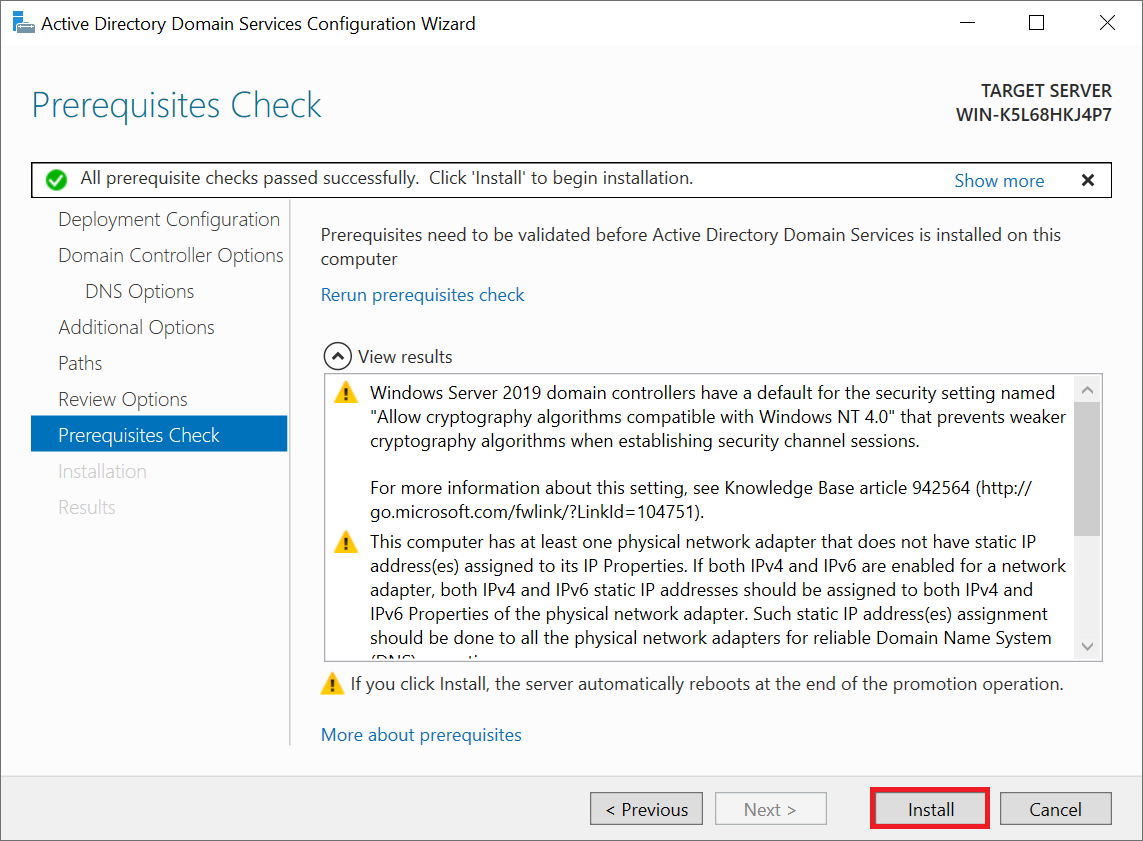
The system checks whether all required components for the installation (prerequisites) are installed on your server. Here you will see some warnings that you can ignore (yellow exclamation mark) and a message that the checks have been approved.
Click 'Install' to start the installation.
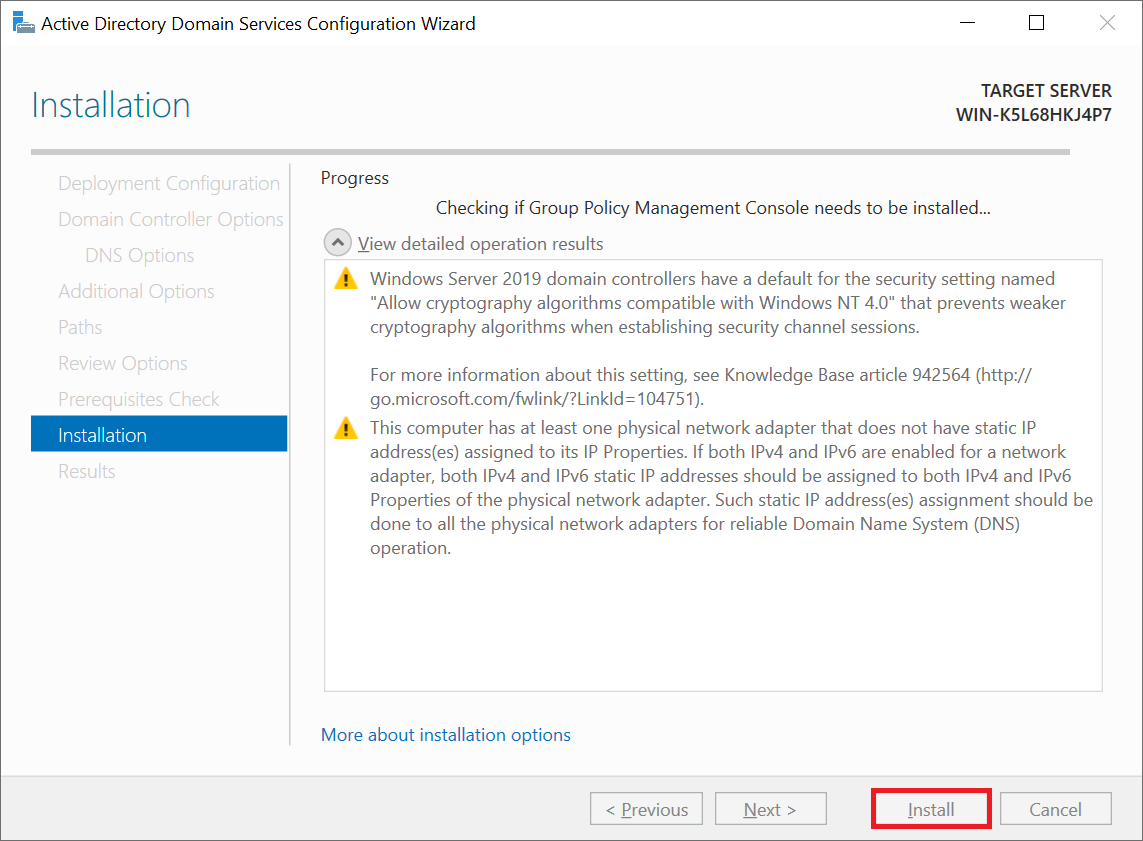
During the installation you will see the same points of attention as in the previous screen. After installation, your server will reboot automatically.
Firewall
The right ports are automatically opened during the configuration of your Active Directory. One of these ports is used for the LDAP service. Simply put, this service allows you to access an Active Directory / Service. However, the LDAP service can be abused for DDoS attacks. It is therefore important to limit access to the LDAP service to your private network (if you only use VPSs with TransIP), specific IP's, or VPN connection (if, for example, your laptop also needs access to the Active Directory). You restrict access as follows:
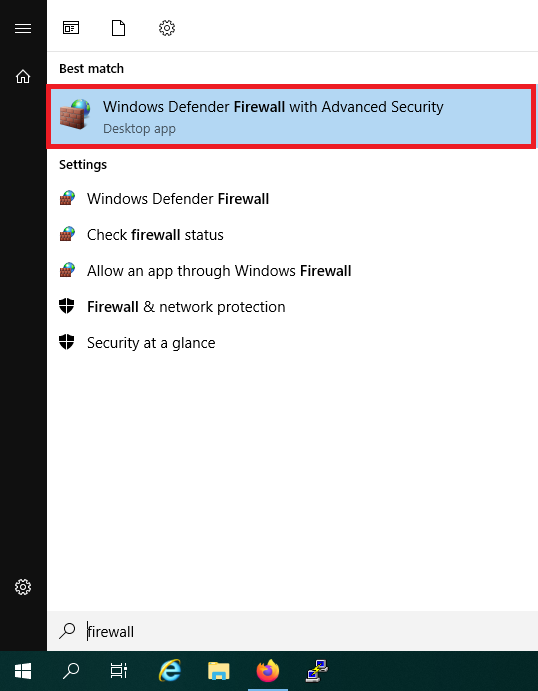
Step 1
Click the start button and use the search term 'Firewall'. Alternatively, you can also find the firewall in the Server Manager under 'Tools'.
In the search results, click 'Windows Firewall with Advanced Security'.
Step 2
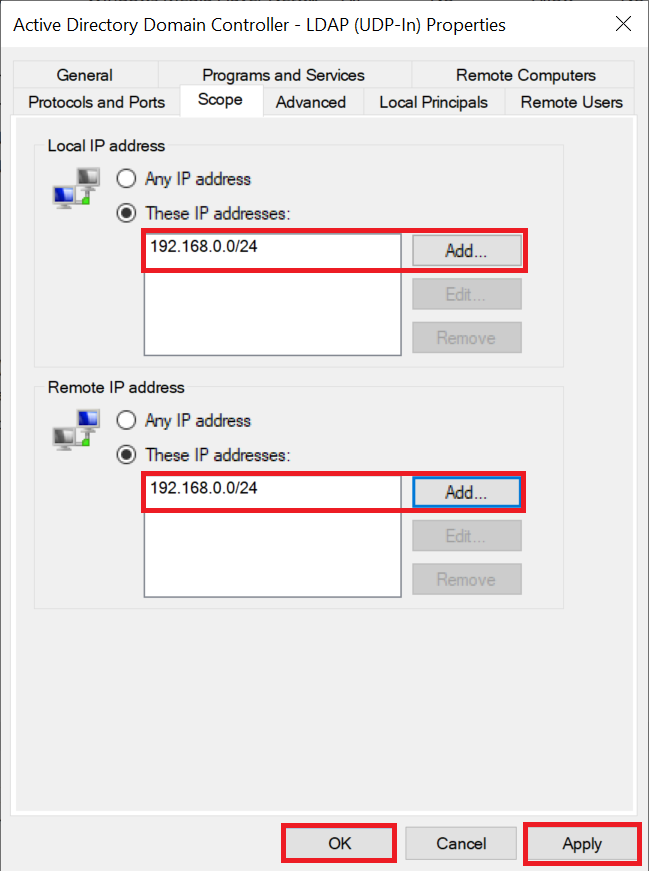
Double click the rule 'Active Directory Domain Controller - LDAP (UDP-In)'.

Step 3
Click the 'Scope' tab and click 'Add' to add the IP range of your private network or VPN, followed by 'Apply' and 'OK'.
The installation of your Active Directory is now complete! Please note: when logging in you no longer use your username, for example Administrator, but the domain or Netbios name from step 16 with the addition \username, for example: transip.local\Administrator or WINDOWS\Administrator.
Should you have any questions left regarding this article, do not hesitate to contact our support department. You can reach them via the ‘Contact Us’ button at the bottom of this page.