You can expand the disk of your VPS or your Block Storage with even more space. Please note that not all filesystems/OS can handle disks larger than 2TB, so check before the upgrade if your filesystem/OS supports this.
This guide assumes that you have already successfully connected and partitioned your existing disk. If this is not the case, first follow the guide for Windows or Linux/BSD.
- Are you using LVM, which can be checked with the command ‘lvdisplay’? If so, use this LVM guide.
- The disk of your VPS or Block Storage cannot be downgraded: This would always lead to data loss.
- Big Storage can be expanded up to 40TB per disk, Fast Storage up to 10TB, and the VPS disk itself, depending on the type, up to a maximum of 1.5TB.
- Our DirectAdmin, Plesk, and cPanel installations based on AlmaLinux use LVM. Plesk installations based on Ubuntu and Debian use gpt.
- During the upgrade of a Block Storage, your VPS will automatically restart. We therefore recommend shutting down your VPS from the operating system (a graceful shutdown) before upgrading a Block Storage.
Expanding the disk of your VPS
Step 1
Log in to your control panel, go to the 'VPS' tab, and click on the name of your VPS on the left.
Step 2
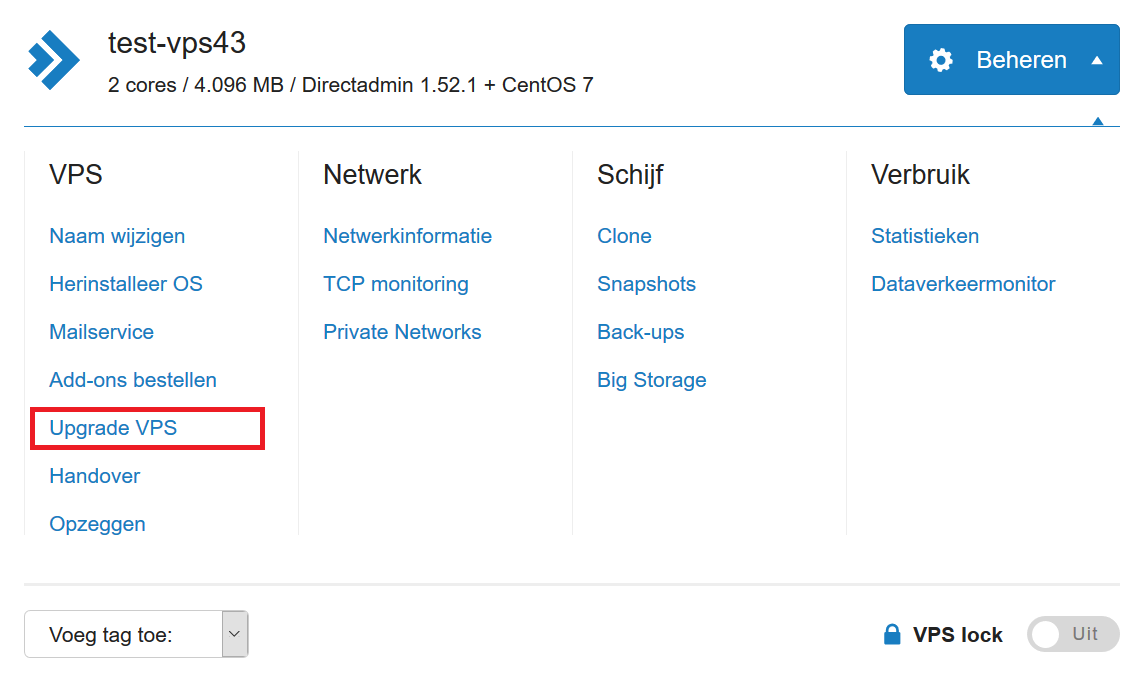
Click on 'Manage' at the top right, followed by 'Upgrade VPS'.
Step 3
By default, you get the option to upgrade your VPS one step larger, for example, from an X1 to an X4, see the screenshot below. Click on confirm to place the order. In that case, do not proceed with step 4.
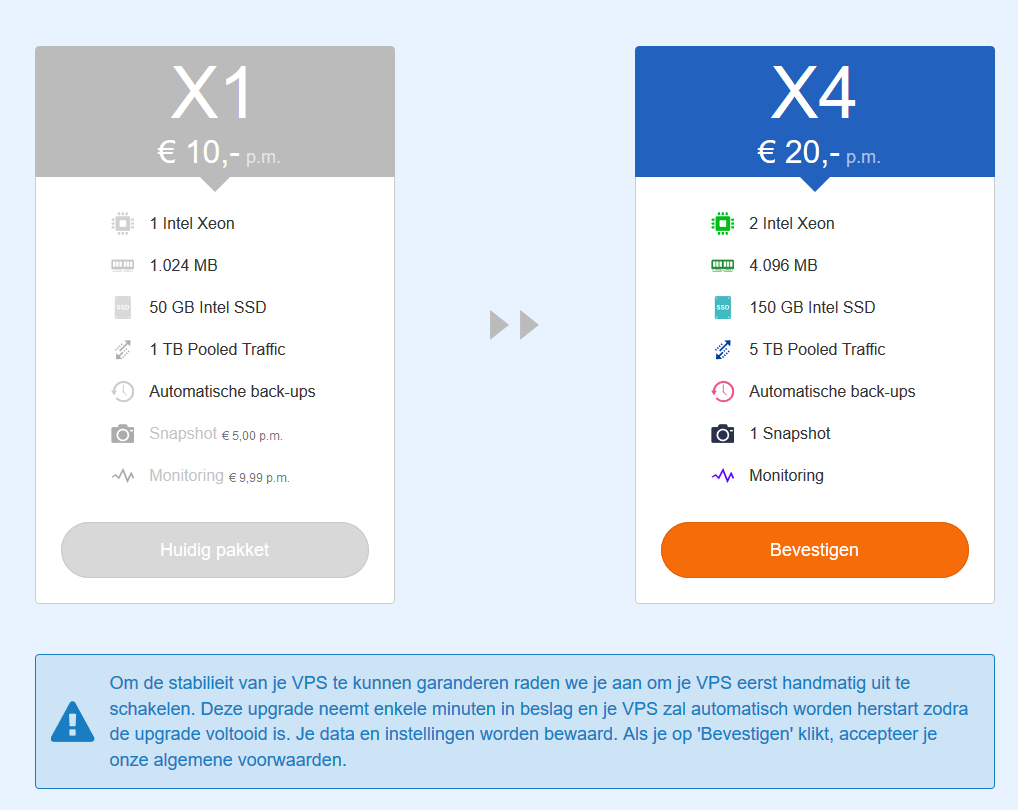
If you prefer to upgrade to a larger VPS or only the disk, click the 'Other upgrade options' button at the bottom of the page and proceed to step 4.

Step 4 - optional
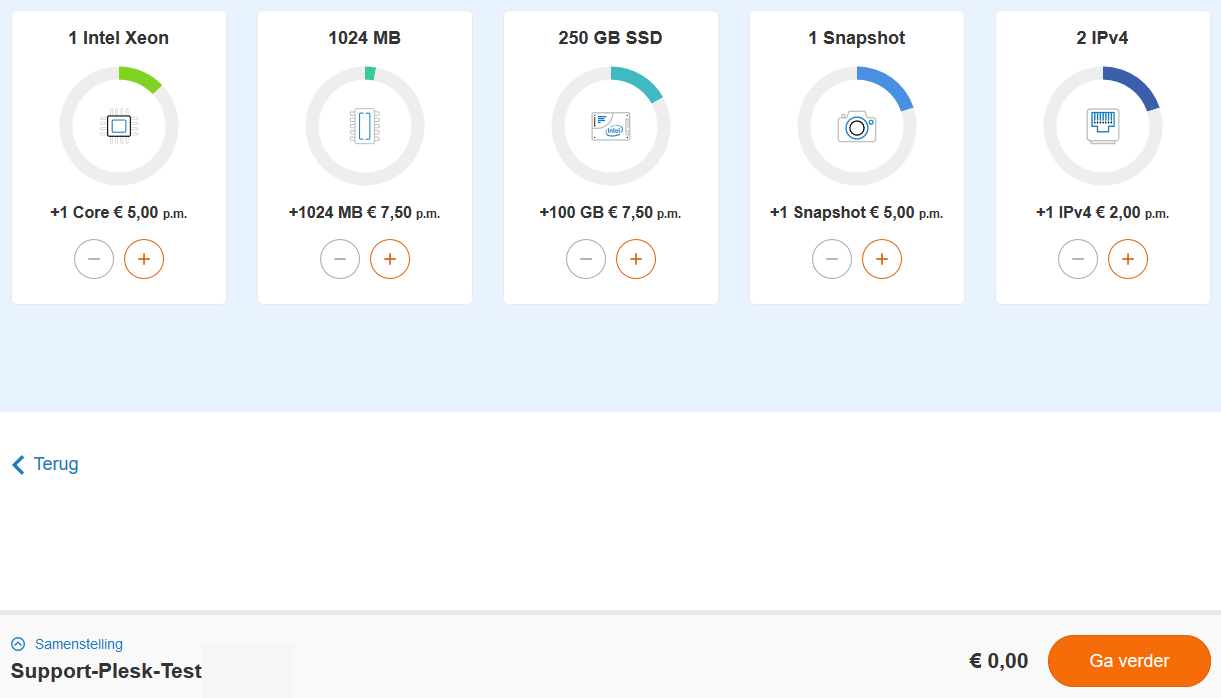
Choose 'Add-ons yourself' if you only want to expand your disk, or 'Choose your own package' if you want to use a larger VPS.

Step 5
Depending on your choice in step 4, you will see one of the following screens:
-
Add-ons yourself: Add add-ons as desired and then click 'Proceed' at the bottom right.
Expanding Block Storage
Step 1
Log in to your control panel and go to 'VPS'.
Step 2
Click on the name of the VPS to which the Block Storage is connected. Directly below your VPS console, click on the gear behind 'Block Storage X TB/GB'.

Step 3
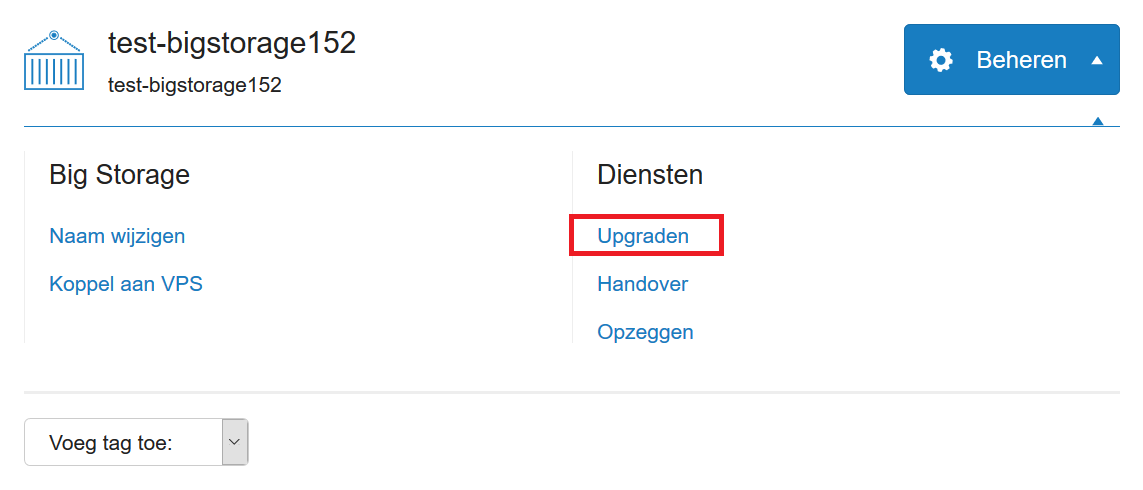
You will now be on the management page of your Block Storage. Click on 'Manage' at the top right and select 'Upgrade'.
Step 4
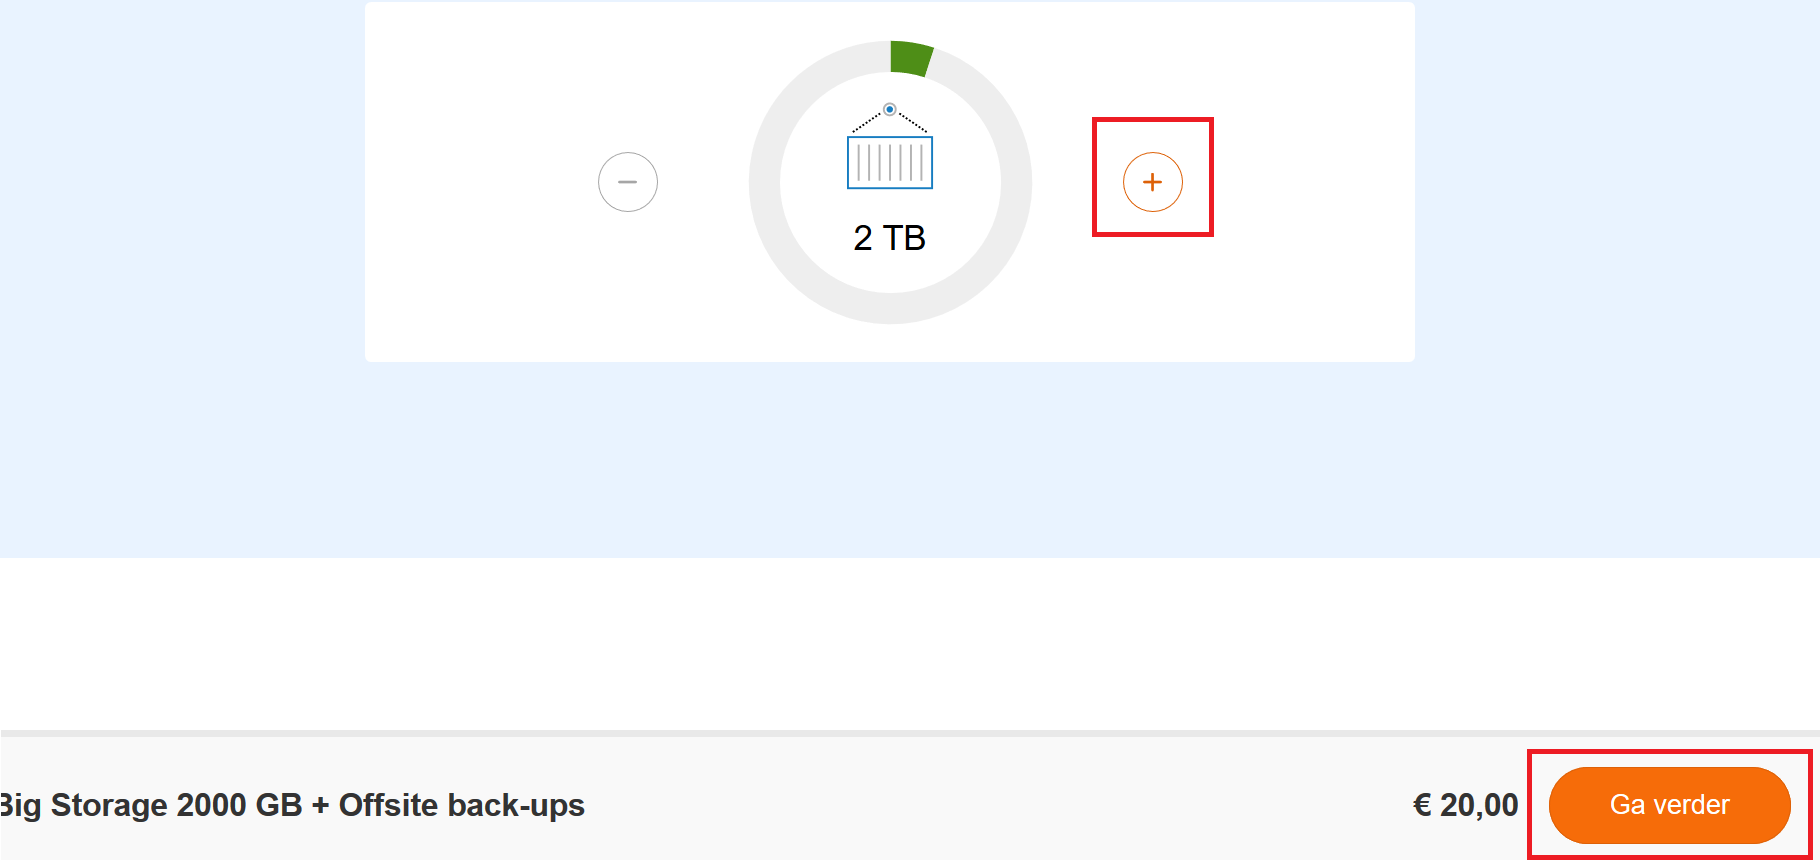
Then enlarge your Block Storage by increasing the disk to the desired size with the 'plus' button. When you are finished, click on 'Proceed' and follow the indicated steps.
Using the extra disk space in Linux / FreeBSD
Step 1
Start parted with the command:
parted /dev/vdaUsually the disk of your VPS is /dev/vda and for Block Storage /dev/vdb. If 'b' is not the letter of your Block Storage disk (can be checked with df -h), replace it with the letter that applies to you.
Step 2
Later in this guide, you will need the exact size of your VPS' / Block Storage disk in GBs. You can find this out with the command:
printYou may now see a warning as shown below. Type 'fix' to automatically correct this.
Warning: Not all of the space available to /dev/vdb appears to be used, you can fix the GPT to use all of the space (an extra X blocks) or continue with the current setting?
Fix/Ignore? fix
You will then see output similar to the code below. The new size of the Big Storage in this example is 4398GB (in bold). Note the value you see on your VPS here.
Model: Virtio Block Device (virth1%)
Disk /dev/vdb: 4398GB
Sector size (logical/physical):512B/512B
Partition Table: gpt
Disk Flags:
Number  Start  End     Size    File system   Name    Flags
 14     1049kB 5243kB  4194kB                        bios_grub
 15     5243kB 116MB   111MB   fat32                 boot, esp
 1      116MB  161GB   161GB   ext4
You will also see the current total size and where the current partitions start and end.
Step 3
Now enlarge the partition with the command (1 is the number of the partition you want to expand):
resizepart 1
Step 4
You will then be asked where the partition should end, and here you enter the desired (maximum) value of your VPS' / Block Storage disk. In this example, 4398GB (the amount behind Disk in step 2):
End? (2199GB)? 4398GB
Step 5
Now exit parted with the command:
quitIf you are using Linux Boot Rescue, now start the VPS (to mount the disk again). Note: use the reset button in your control panel to restart your VPS. Linux Boot Rescue is started via the network. If you restart via a reboot command, you will end up in a network boot. You will then see the installation screen of your OS instead of your login screen.
Step 6
Now directly expand the filesystem with the command for ext4 partitioning. You can see the type of partitioning in the output of the command from step 2 in the File System column.
ext4:
resize2fs /dev/vdb1xfs:
If you use xfs instead of ext4 (to expand both the filesystem and the partition):
xfs_growfs /mnt/bigstorage
    growpart /dev/vdb 1
By default, the maximum available space will be added to the partition. If you want to adjust this, use the argument '-D [SIZE IN BLOCKS]' after 'xfs_growfs', for example:
xfs_growfs -D [SIZE IN BLOCKS] /mnt/bigstorage
You can get more information about the available blocks with the command:
xfs_info /mnt/bigstorage
Windows Server
For Windows Server, there is a separate guide for expanding the space of your VPS' / Block Storage disk. You can find it here.
If you still have questions after reading this article, do not hesitate to contact our support department. You can reach them via the 'Contact Us' button at the bottom of this page.


