OpenStack offers multiple options for managing your OpenStack project. In addition to accessing through the Horizon web interface, you can also utilize the 'Command Line Interface' (CLI) of OpenStack to fully manage and maintain your OpenStack environment.
In this tutorial, we will show you how to install the OpenStack CLI client on Windows, MacOS, and Linux systems. We recommend ensuring that the computer on which you are performing this installation is fully up-to-date before starting the installation.
Installing OpenStack CLI Tools on Windows
It's significantly easier to install the OpenStack CLI tools if you use the Windows Subsystem for Linux (WSL). In that case, follow the installation instructions for Linux.
Step 1
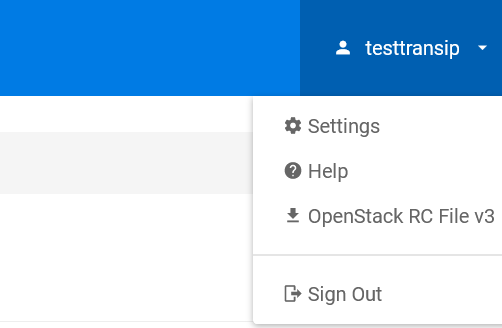
Login to the OpenStack Horizon web interface and click on your username in the upper right corner > 'OpenStack RC File v3'. This will initiate a download for
Step 2
Windows doesn't natively handle Shell scripts, and alternative methods to execute them have varying results. Therefore, we recommend modifying the downloaded file to a PowerShell script.
Open the downloaded file and remove all commented lines (lines starting with #) and lines starting with 'if'. The resulting content should look like this:
$env:OS_AUTH_URL="https://identity.openstack.cloudvps.com/v3"
$env:OS_PROJECT_ID="45c8362ff22e4dfda722e999af592872"
$env:OS_PROJECT_NAME="testtransip-open-stack"
$env:OS_USER_DOMAIN_NAME="transip"
$env:OS_PROJECT_DOMAIN_ID="ac23823215e24239b1f693ed5a5ee2e6"
$env:OS_TENANT_ID=$null
$env:OS_TENANT_NAME=$null
$env:OS_USERNAME="testtransip"
$OS_PASSWORD_INPUT= Read-Host -Prompt "Please enter your OpenStack Password for project $env:OS_PROJECT_NAME as user $env:OS_USERNAME" -AsSecureString
$env:OS_PASSWORD = [System.Runtime.InteropServices.Marshal]::PtrToStringAuto([System.Runtime.InteropServices.Marshal]::SecureStringToBSTR($OS_PASSWORD_INPUT))
$env:OS_REGION_NAME="AMS"
$env:OS_INTERFACE="public"
$env:OS_IDENTITY_API_VERSION=3
Make the following changes in these lines:
- Replace 'export' and 'unset' with '$env:'
- Close the line '$env: OS_TENANT_ID and _NAME with = $null
- Replace the entire 'echo' line with '$OS_PASSWORD_INPUT= Read-Host -Prompt "Please enter your OpenStack Password for project $env:OS_PROJECT_NAME as user $env:OS_USERNAME" -AsSecureString
- Replace the line starting with 'read' with '$env:OS_PASSWORD = [System.Runtime.InteropServices.Marshal]::PtrToStringAuto([System.Runtime.InteropServices.Marshal]::SecureStringToBSTR($OS_PASSWORD_INPUT))
- Enclose the values of all variables in quotation marks " " except for the values $null and 3, see the example below.
Note: Do not use spaces unless indicated in the example below.
The resulting content should look like this (pay attention to the scrollbar):
$env:OS_AUTH_URL="https://identity.openstack.cloudvps.com/v3"
$env:OS_PROJECT_ID="45c8362ff22e4dfda722e999af592872"
$env:OS_PROJECT_NAME="testtransip-open-stack"
$env:OS_USER_DOMAIN_NAME="transip"
$env:OS_PROJECT_DOMAIN_ID="ac23823215e24239b1f693ed5a5ee2e6"
$env:OS_TENANT_ID=$null
$env:OS_TENANT_NAME=$null
$env:OS_USERNAME="testtransip"
$OS_PASSWORD_INPUT= Read-Host -Prompt "Please enter your OpenStack Password for project $env:OS_PROJECT_NAME as user $env:OS_USERNAME" -AsSecureString
$env:OS_PASSWORD = [System.Runtime.InteropServices.Marshal]::PtrToStringAuto([System.Runtime.InteropServices.Marshal]::SecureStringToBSTR($OS_PASSWORD_INPUT))
$env:OS_REGION_NAME="AMS"
$env:OS_INTERFACE="public"
$env:OS_IDENTITY_API_VERSION=3
Save the file with the .ps1 extension (as a PowerShell script).
Step 3
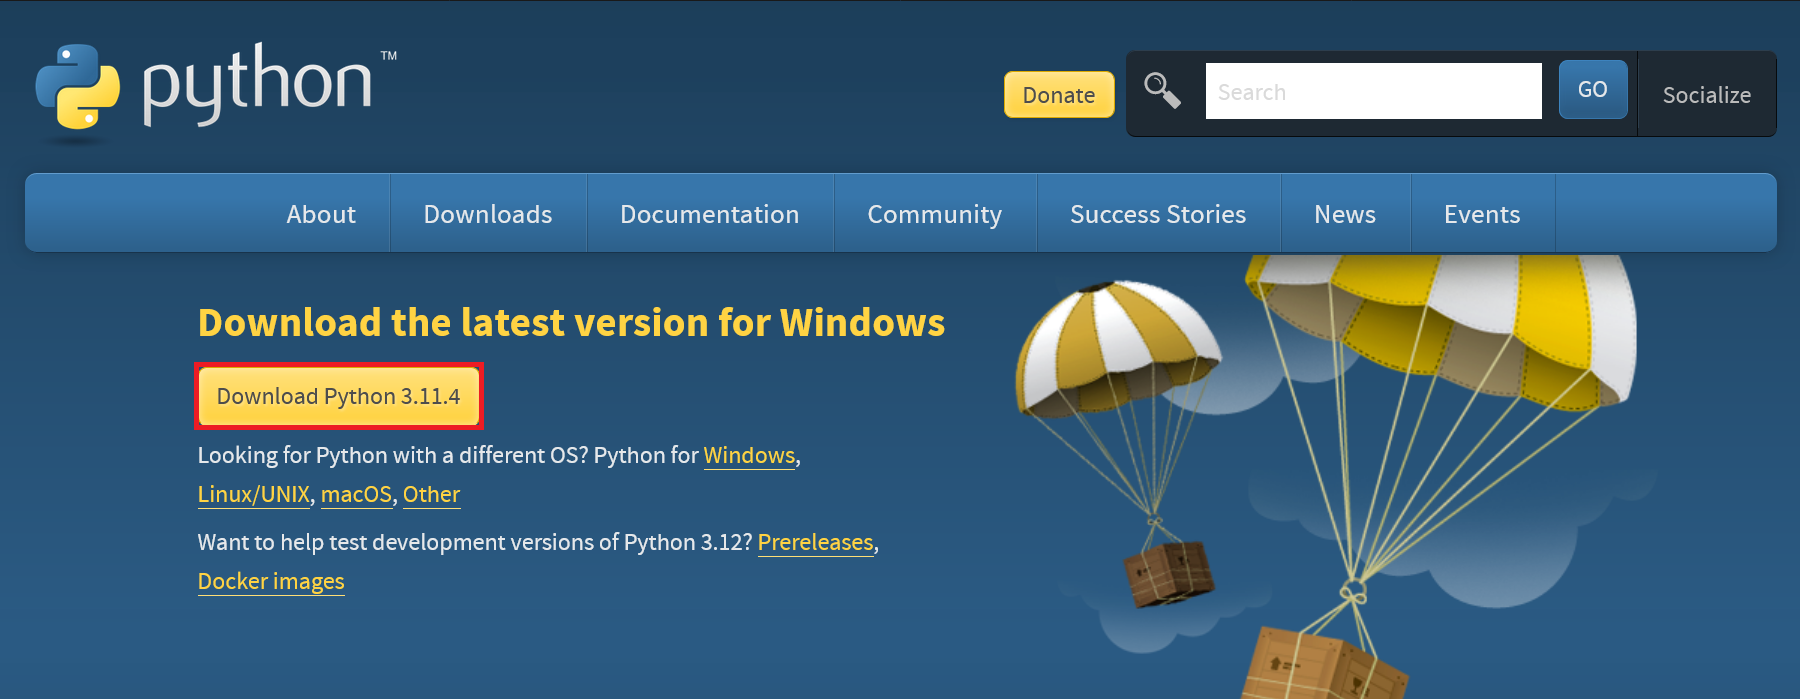
Download the latest version of python by clicking on the 'Download Python
Step 4
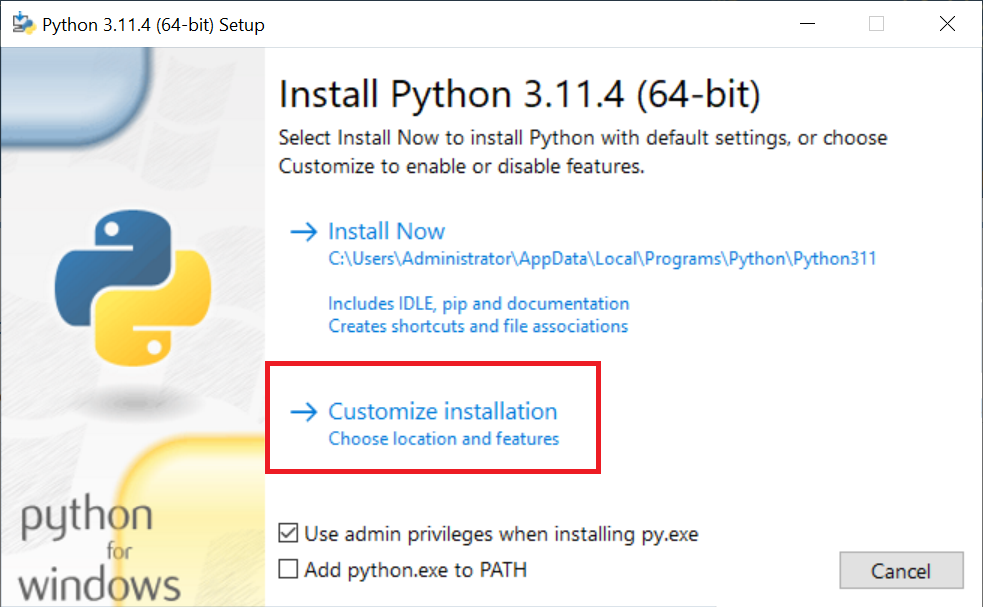
Open the downloaded file and click 'Customize Installation'. This will allow you to check the option to correctly set the environment variables during installation.
Step 5
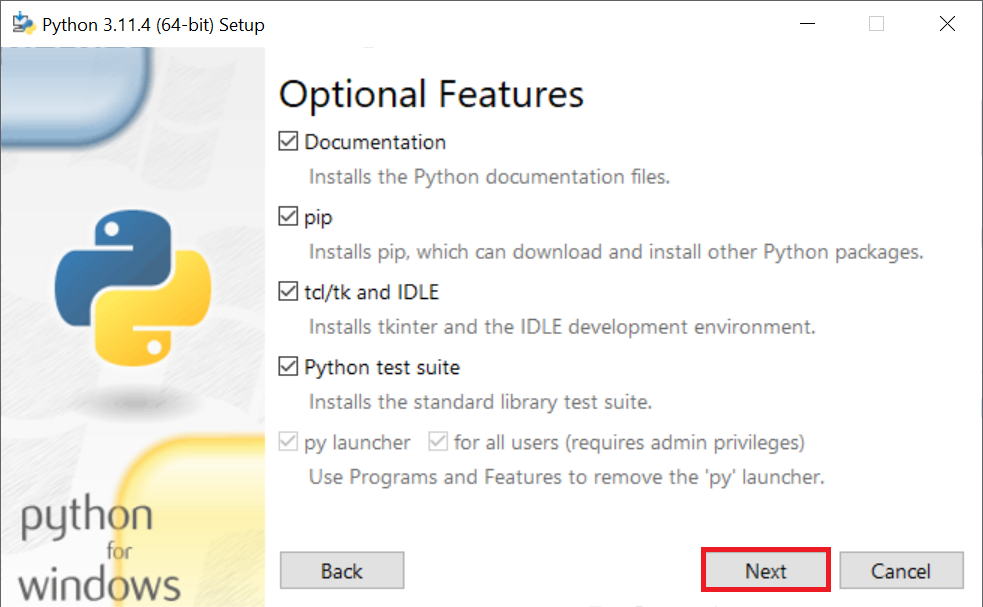
In the 'Optional Features' step, don't make any changes and click 'Next'.
Step 6
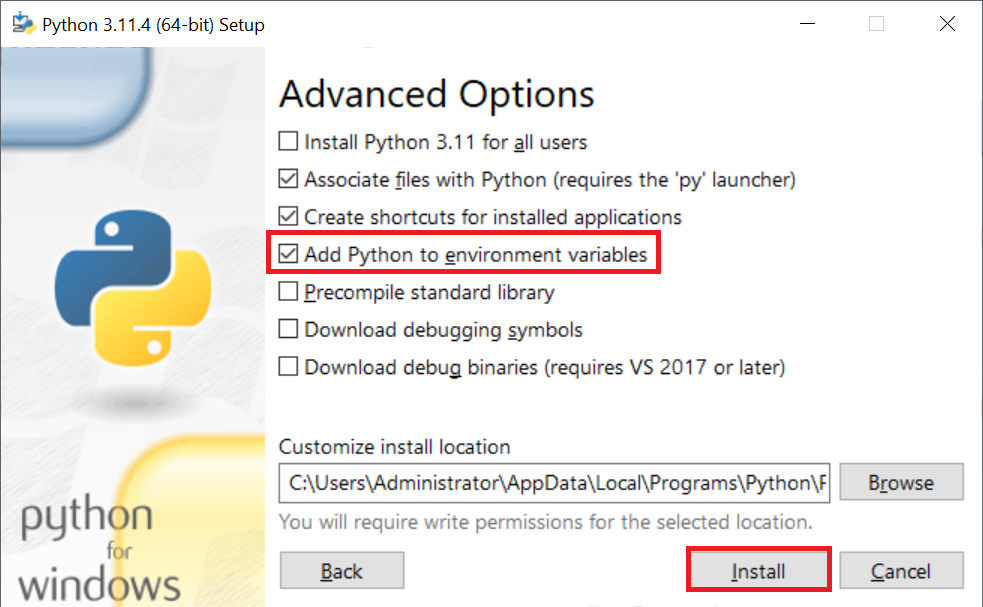
In the 'Advanced Options' step, check the option 'Add Python to environment variables' and then click 'Install'.
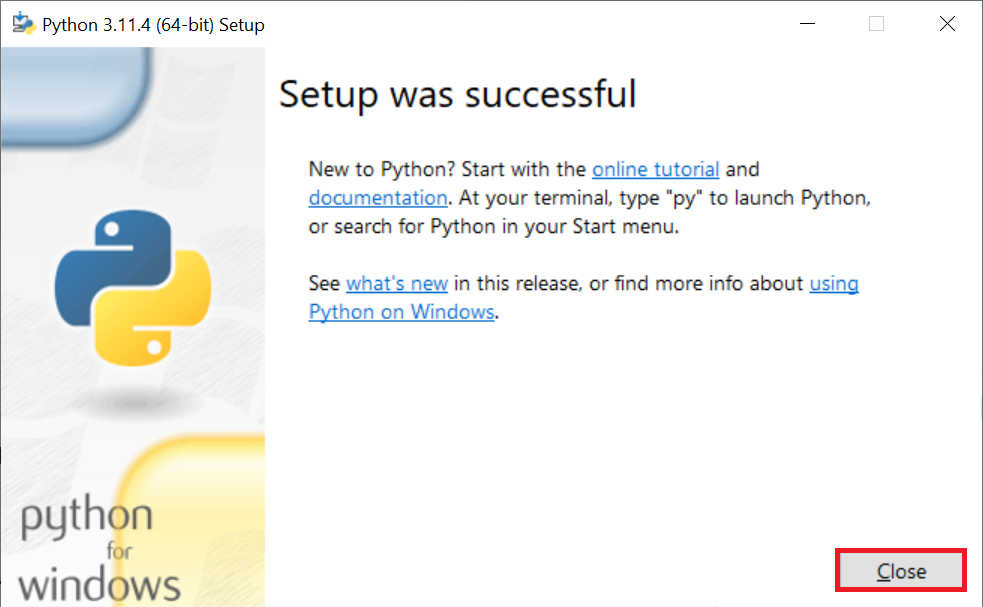
When the Python installation is completed, you will see the confirmation 'Setup was successful'. Optionally, click on 'Disable path length limit' first (if applicable and visible on your operating system), or directly click on 'Close' to close the window.
Step 7
The installation of the OpenStack CLI client requires Microsoft Visual C++ 14.0 or newer. Download it by clicking on https://visualstudio.microsoft.com/visual-cpp-build-tools/ and then clicking on 'Download Build Tools'.

Step 8
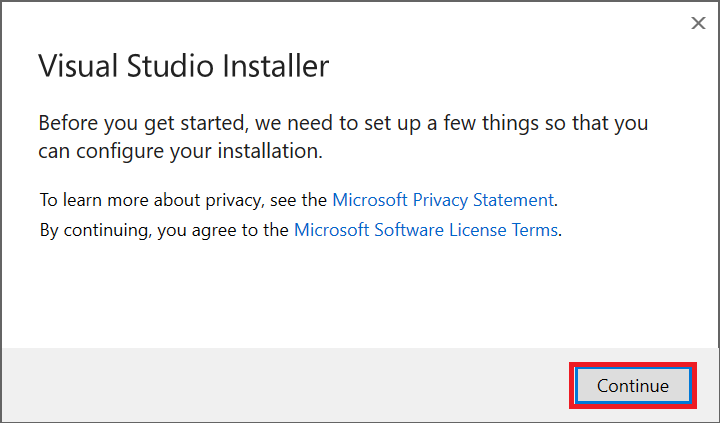
Open the downloaded file and click 'Continue' to start the installation.
Step 9
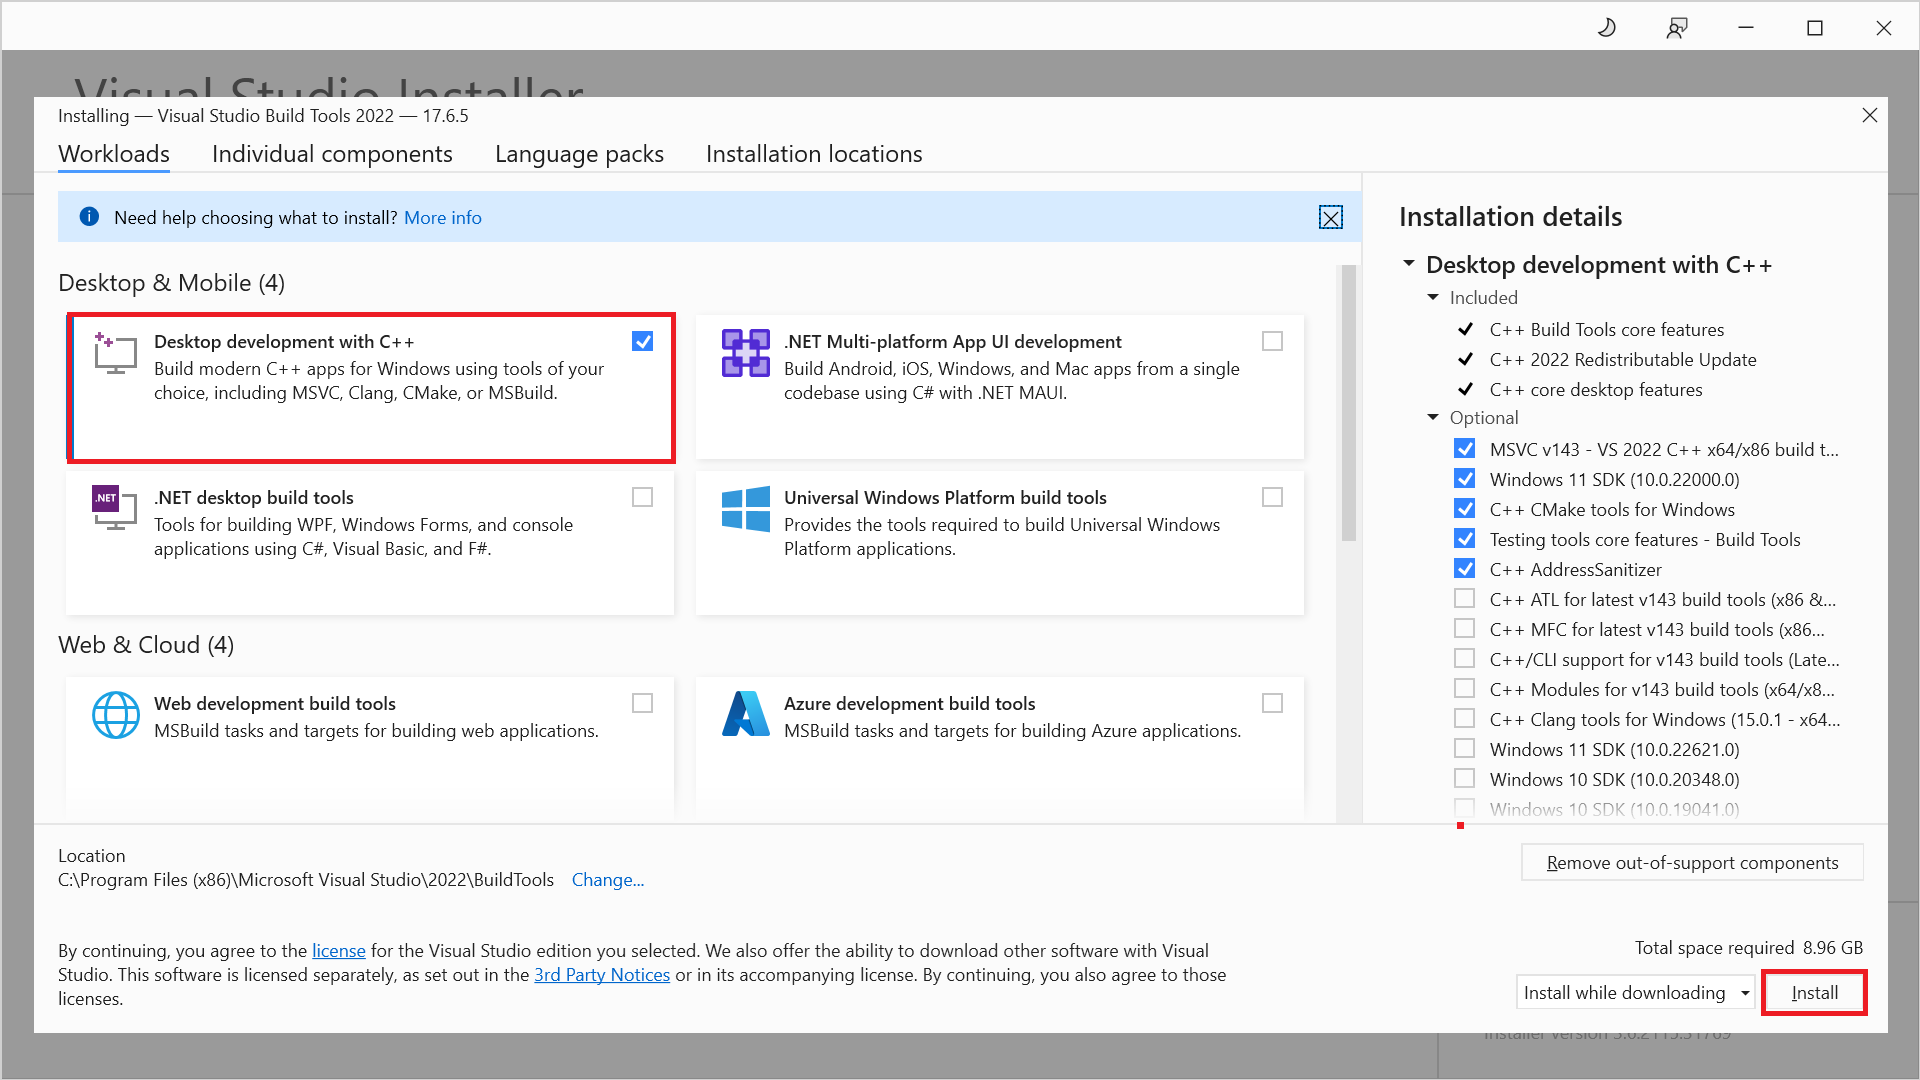
Select 'Desktop development with C++' in the 'Advanced Options' step and click the 'Install' button at the bottom right to install Desktop development with C++. This process will take a while.
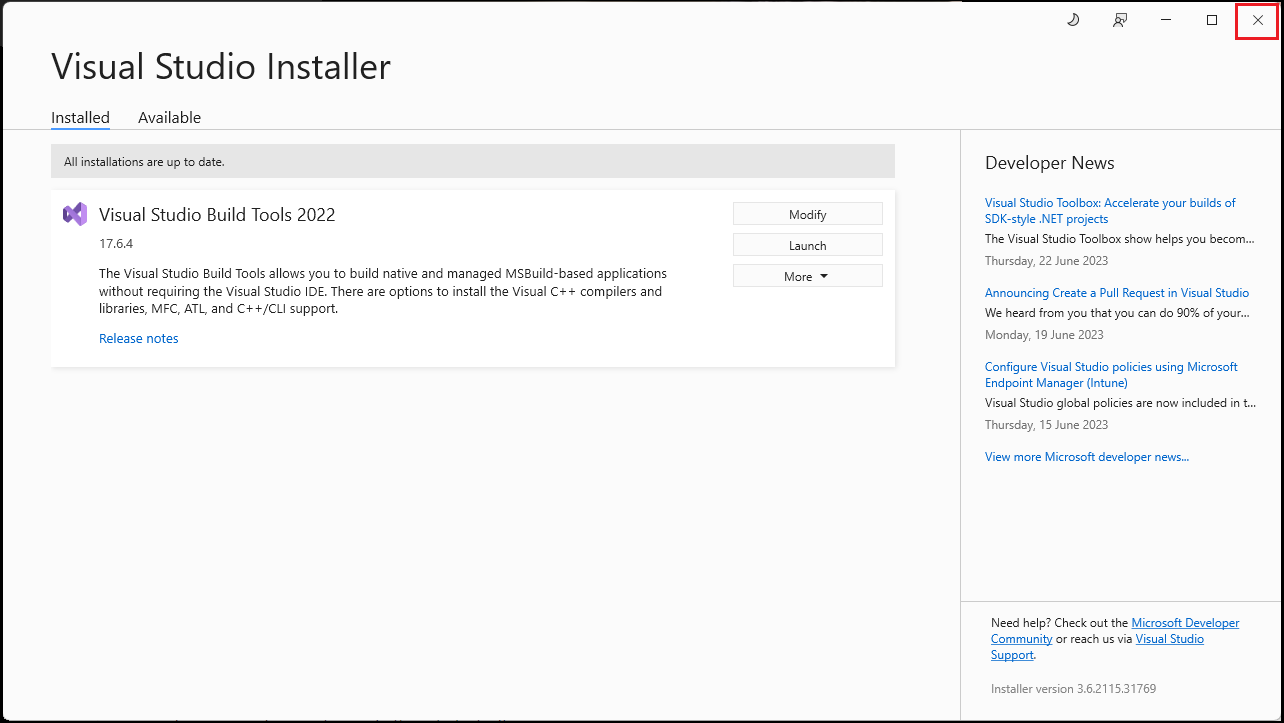
After the installation, click the cross at the top right to close the installation window.
Step 10
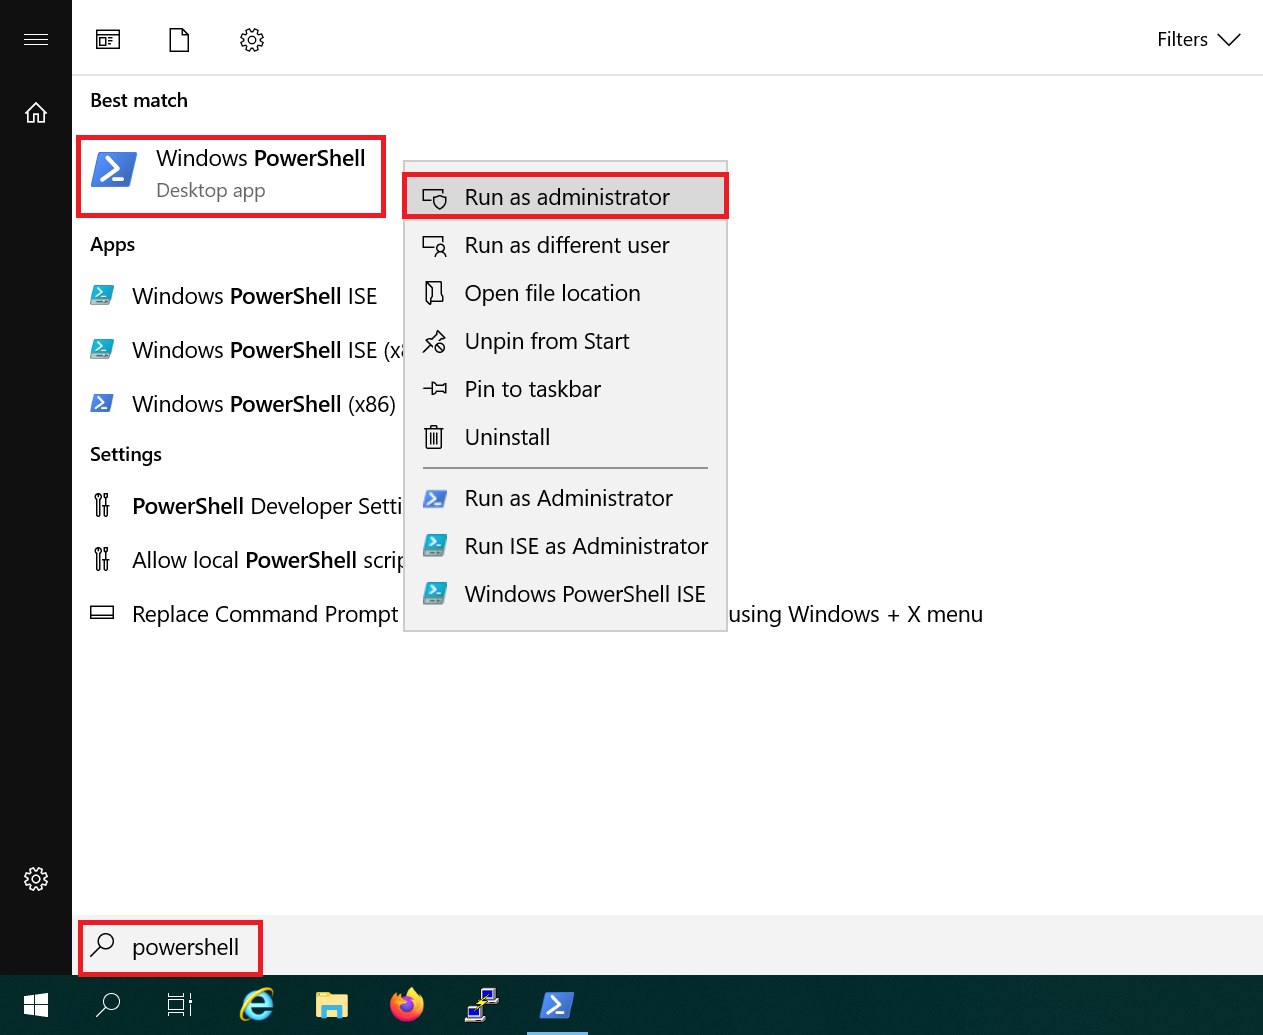
Run PowerShell as an administrator (Start > PowerShell > Right-click > Run as administrator).
Step 11
Install the OpenStack CLI client with the following commands:
python.exe -m pip install --upgrade pip
pip install python-openstackclient
The first command installs any updates to Pip. The second one actually installs the OpenStack CLI client.
Step 12
Do you remember the file from step 2? You need this file to configure the OpenStack CLI client to use your OpenStack project.
Navigate to the directory where you saved the file, for example:
cd c:\users\\Downloads\
Step 13
The PowerShell script from step 2 is unsigned. Therefore, start a PowerShell shell in the PowerShell shell and then execute the script with the following commands:
powershell.exe -ExecutionPolicy Unrestricted
.\-open-stack-openrc.ps1
Replace
You will be prompted for the password you use to log in to the OpenStack Horizon web interface (see our 'OpenStack getting started' tutorial for how to set the password). Note: No confirmation is shown when you enter the correct password:
Please enter your OpenStack Password for project testtransip-open-stack as user testtransip:
That's it! You can now directly test the functionality of the OpenStack client with the command:
openstack server list
If you have already created one or more instances, the output will look something like this (pay attention to the scrollbar):
transip@Demo:~$ openstack server list
+--------------------------------------+-------------+--------+-----------------------------------------------------------------------------------------+-------+--------------+
| ID                                   | Name        | Status | Networks                                                                                | Image | Flavor       |
+--------------------------------------+-------------+--------+-----------------------------------------------------------------------------------------+-------+--------------+
| f506cf10-c53d-4d51-996d-9dc721472637 | Server 2022 | ACTIVE | TestNetwork=192.168.0.2; net-public=123.123.123.123; net-public-ipv6=2a02:348:5e6:1::6b60 |       | Standard 4GB |
+--------------------------------------+-------------+--------+-----------------------------------------------------------------------------------------+-------+--------------+
This concludes our guide on installing the CLI tools within OpenStack. You can find a complete overview of available commands at https://docs.openstack.org/python-openstackclient/latest/cli/command-list.html#command-list.
Installing OpenStack CLI client on MacOS/Linux
Step 1
Log in to the OpenStack Horizon web interface and click on your username at the top right corner > 'OpenStack RC File v3'. This will start the download of
Are you working from Windows via WSL? You can open the downloaded file and copy its content (it's very small). Then paste it into a new file, for example openstack.sh, and use that filename in step 3.

Step 2
Install the OpenStack CLI client via command-line with the following commands:
CentOS Stream / AlmaLinux / Rocky Linux:
sudo dnf -y updatesudo dnf -y install python3-pippip install python3-openstackclient
Ubuntu/Debian:
sudo apt -y update && sudo apt -y upgrade
sudo apt -y install python3-openstackclient
MacOS:
Python3 is required for installing the OpenStack CLI client on MacOS. You can download Python3 from this website.
pip install python-openstackclient
Step 3
Do you remember the file from step 1? It contains all the necessary information to configure the OpenStack CLI client to use your OpenStack project. Use the following command to configure it:
source -open-stack-openrc.sh
- Replace
with the actual username in the file from step 1 - Execute the command in the directory where the .sh file is saved, or reference it like this:
source /some/directory/-open-stack-openrc.sh
You will be prompted for the password you use to log in to the OpenStack Horizon web interface (see our 'OpenStack getting started' tutorial for how to set the password). Note: No confirmation is shown when you enter the correct password:
Please enter your OpenStack Password for project testtransip-open-stack as user testtransip:
Enter the password. No confirmation is shown when you enter the correct password.
That's it! You can now directly test the functionality of the OpenStack client with the command:
openstack server list
If you have already created one or more instances, the output will look something like this (pay attention to the scrollbar):
transip@Demo:~$ openstack server list
+--------------------------------------+-------------+--------+-----------------------------------------------------------------------------------------+-------+--------------+
| ID                                   | Name        | Status | Networks                                                                                | Image | Flavor       |
+--------------------------------------+-------------+--------+-----------------------------------------------------------------------------------------+-------+--------------+
| f506cf10-c53d-4d51-996d-9dc721472637 | Server 2022 | ACTIVE | TestNetwork=192.168.0.2; net-public=123.123.123.123; net-public-ipv6=2a02:348:5e6:1::6b60 |       | Standard 4GB |
+--------------------------------------+-------------+--------+-----------------------------------------------------------------------------------------+-------+--------------+
This concludes our tutorial on installing the CLI tools within OpenStack. You can find a complete overview of available commands at https://docs.openstack.org/python-openstackclient/latest/cli/command-list.html#command-list.


