In OpenStack, you can create virtual routers. This enables advanced networking functionalities, allowing you to:
- Create an exit point for your private network to the public internet. This is similar to how your home computer (here, your OpenStack instance) connects via your internet provider's modem; your computer doesn't have its own external IP address, but the modem does, and it routes public internet traffic to/from your computer.
-
Enable communication between instances/VMs in different private networks.
In this tutorial, we will demonstrate how to create a router in OpenStack and assign it to a (private) network.
Step 1
Log in to the OpenStack Horizon web interface.
Step 2
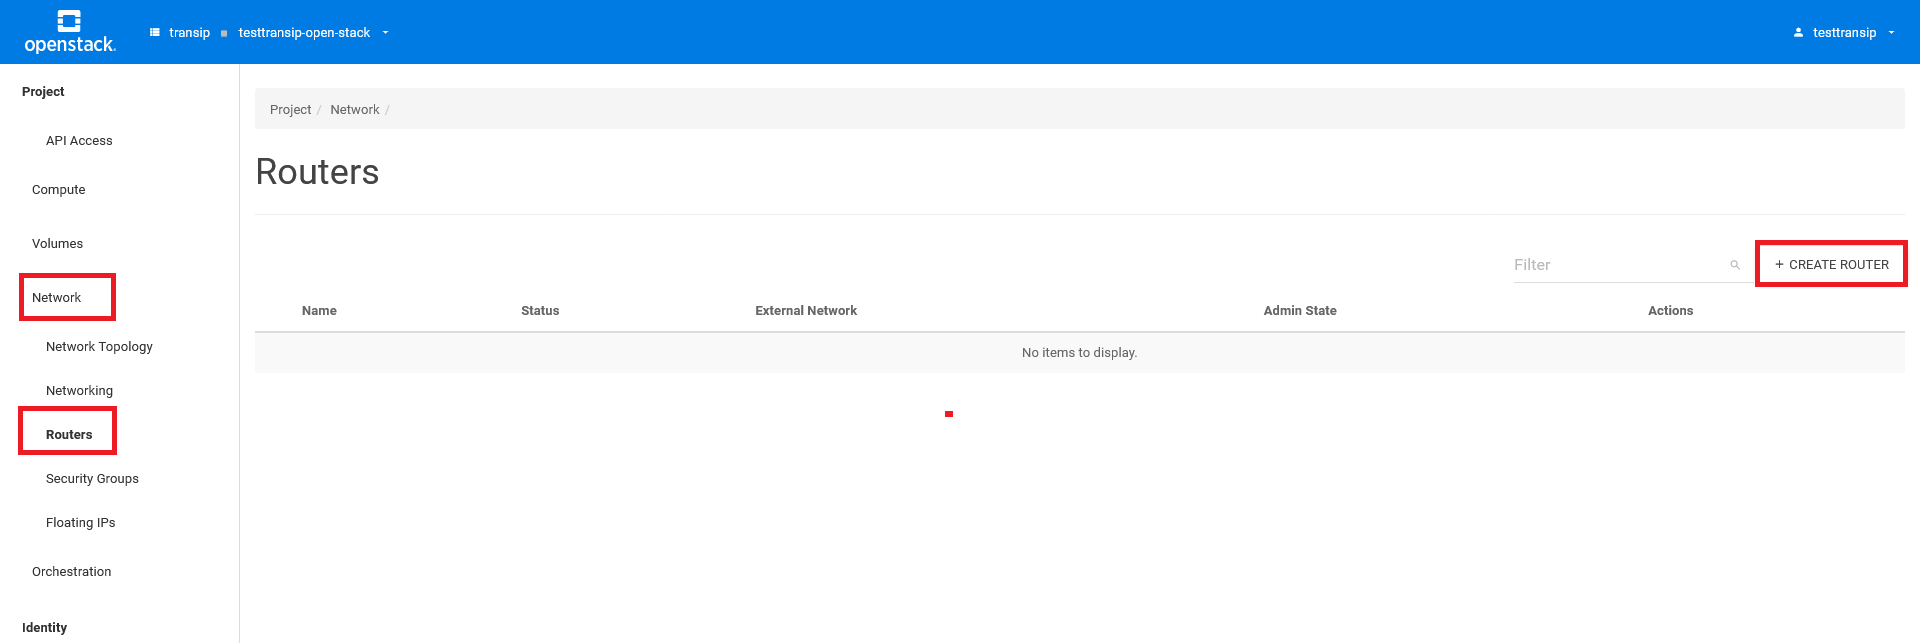
In the left menu, click on 'Network' > 'Routers' and then click on 'Create Router' on the right side.
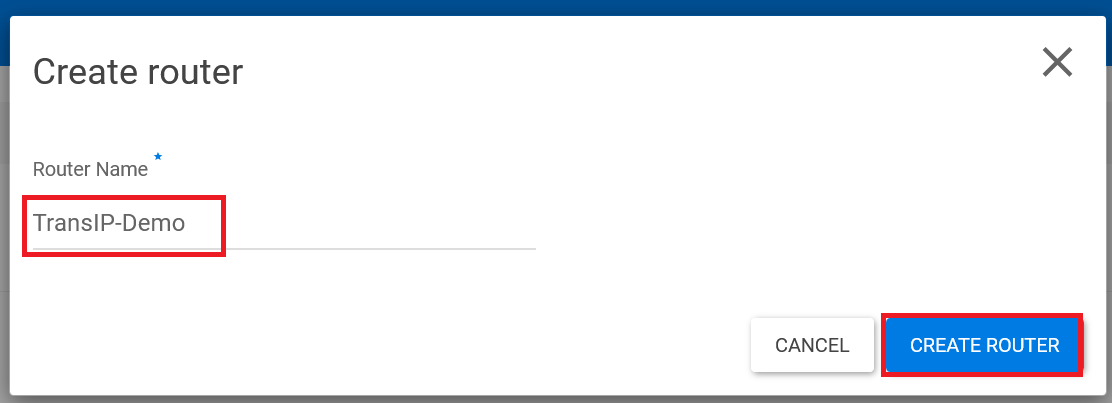
In the 'Create Router' window, provide a name of your choice for the router and click 'Create Router'. The router will now be created.
Step 3
You will return to the 'Routers' overview. Click on 'set gateway' behind the router you just created.

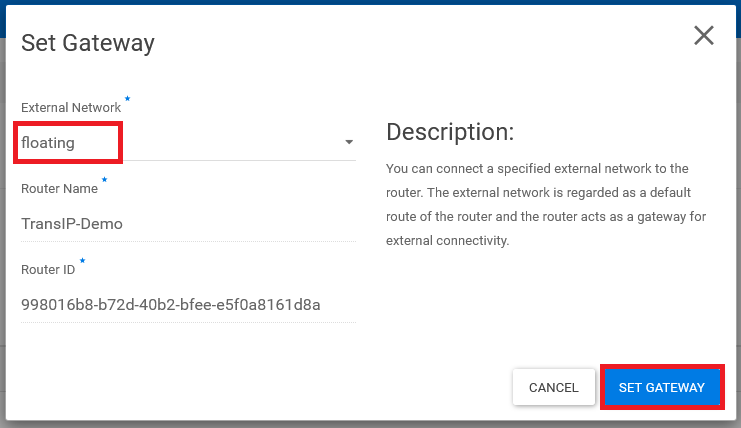
A 'Set Gateway' pop-up window will appear. Select the 'floating' network and click 'Set Gateway'. This links the router to the external 'floating' network used to assign floating IP addresses.
Don't see the 'floating' network? Go to 'Compute' > 'Instances' and select the option 'associate floating ip' under 'Actions' for any instance. Click the plus icon in the appearing window and then close the pop-up; the 'floating' network will now be automatically created in your OpenStack project, see also our floating IP guide (step X to X).
Step 4
Finally, assign an interface to your router, specifically from one of your previously created private networks (for example, see our guide on creating a private network in OpenStack). This way, you're connecting them together.
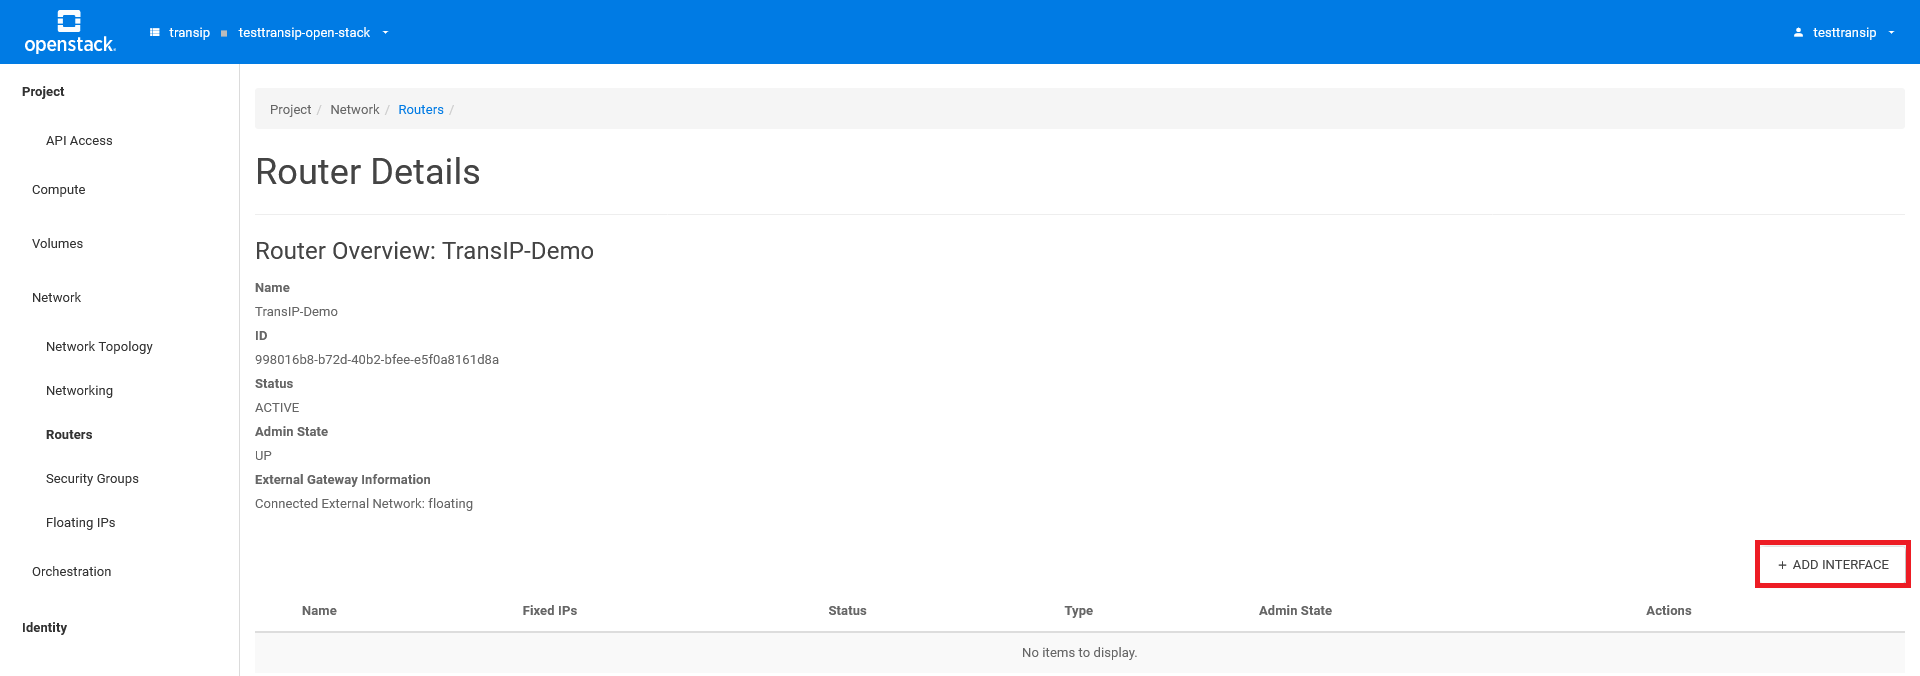
Click on the name of your router.

You will now see the 'Router Details' overview of the respective router. Click on 'add interface' at the bottom right.
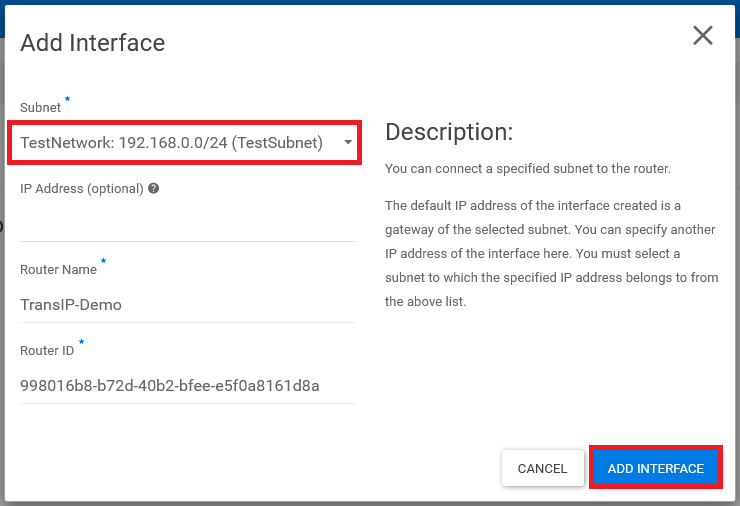
Finally, in the 'Add Interface' pop-up window, select the subnet of the desired private network. You don't necessarily need to specify an IP address; the gateway address will be automatically used. Lastly, click on 'add interface' to link the interface to your router.
Note: You can only connect self-made private networks to a router using this method.
That's it! Your router is now connected to your private network, and instances exclusively connected to your private network can now access the public internet through the router.


